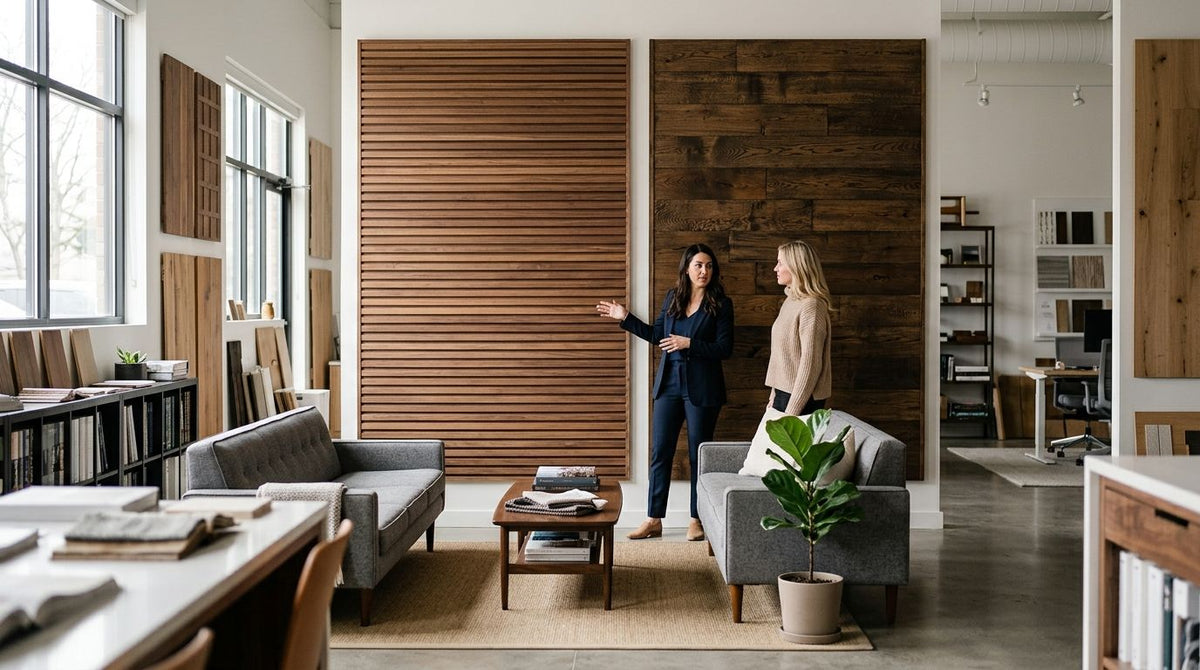
Interior design studio wall panels are wood-veneer slat panels with acoustic felt backing, fitted on showroom or meeting-room walls so a studio can show clients a real finish while cutting the echo that makes small consultation rooms sound harsh. This guide covers how a design studio picks a finish, orders a sample before committing, and builds a feature wall that works as both décor and a live sample board in 2026.
- Interior design studio wall panels pair real wood veneer with acoustic felt backing — a felt-backed slat panel like Natural Oak works double duty as décor and echo control.
- Order a physical sample before a full wall run; grain and tone shift under a studio's own lighting rig.
- 3D decorative panels such as Snowdrop or Gardenia have no felt backing, so they add texture but not acoustic control on their own.
- Match panel format to ceiling height before ordering — 240cm and 300cm formats avoid an awkward horizontal cut line.
- Mixing more than two wood finishes on one feature wall dilutes the look a studio is trying to sell.
Why interior design studio wall panels matter for design studios
A design studio's meeting room does two jobs at the same time: it sells the finish and it has to sound decent while someone talks through swatches for twenty minutes straight. Glass frontage, concrete floors and plasterboard bounce sound around a small room, which makes voice clarity worse right when a client needs to focus on a decision.
A wood veneer panel with acoustic felt backing solves both problems on one wall. The client sees and touches the actual finish — say, Natural Oak — while the felt backing behind it cuts the reverberation that makes a small studio feel noisy. That's different from a retail or hospitality wall, where a panel only has to look right. A design studio's wall panel is also the pitch, which is why the finish on the wall should match what's in the specification catalogue, not a stock render.
How to specify wall panels for a design studio showroom
Audit your showroom's echo and layout
Walk the meeting room before you order anything. Reflective surfaces and awkward proportions decide how much acoustic treatment the wall actually needs.
- Note every hard reflective surface: glass frontage, concrete or tile flooring, bare plasterboard
- Measure the meeting room's dimensions and note where the client sits relative to the wall
- Check ceiling height against the 240cm and 300cm panel formats before you commit to a run
- Flag any wall interrupted by doors, windows or a reception desk
Match the finish to your specification catalogue
Pick a wood tone that mirrors what the studio actually specifies for clients, not whatever looks best in a product photo.
- Natural Oak: light tone, suits Scandinavian and minimalist briefs
- Black Oak: dark and dramatic, works for moody consultation spaces
- Rustic Oak or Smoked Oak: heavier grain, suits period or industrial projects
- Walnut or Mocca: warm mid-tones for hospitality-adjacent studios
- Grey Oak: neutral, pairs with almost any client mood board
Order a sample before committing to a full wall
This is the step where the studio's own product enters the process — after the wall's been measured and the finish shortlisted, not before. Grain and tone shift under a studio's spotlights in a way a screen never shows. Order a sample panel in the two or three finishes on your shortlist and hold each one against the actual wall at the time of day clients usually visit. The studio's own guide to ordering acoustic wall panel samples before buying walks through what to check on a sample beyond colour.
- Hold the sample against the wall under studio lighting, not daylight from a phone camera
- Check the felt backing depth if the panel sits near a socket or trim
- Compare at least two finishes side by side — tone reads differently in isolation
- Confirm the sample matches the batch you'd actually receive, not an older stock photo
Design the feature wall as a working display
A studio's feature wall should double as a sample board a client can reference mid-conversation.
- A floor-to-ceiling slat run behind the reception desk as the first thing a client sees
- A split wall using two finishes side by side to demonstrate contrast options
- A 3D decorative panel accent next to a flat slat run, to show texture range in one glance
- A panel wall with LED strip lighting along the grooves to highlight depth for evening viewings


Size the run and order end pieces
Measure the actual wall in centimetres before ordering, not the room's rough footprint.
- Measure wall width and height in centimetres, not feet
- Choose 240cm or 300cm format based on ceiling height, not the cheaper option
- Order end pieces or trims for any exposed edge — a cut edge on a showroom wall reads as unfinished
- Plan around doors, windows or a reception desk before the panel count is finalised
Fit and test the wall before a client visit
- Level the wall first; slat panels amplify any lean in the surface
- Fix panels with mechanical fixings or panel glue depending on the wall substrate
- Stagger joins across a long run so the seam pattern doesn't draw the eye
- Test voice clarity in the finished room before the next client meeting, not after
Comparing wall panel options for a design studio
| Option | Best for | Key limitation |
|---|---|---|
| Felt-backed wood veneer slat panel (Natural Oak, Rustic Oak) | Meeting rooms needing acoustic control alongside a real wood finish | Felt backing adds depth, so recesses and trim need planning |
| 3D decorative wall panel (Snowdrop, Gardenia) | Reception feature walls that need texture and pattern, not acoustics | No felt backing, so it won't reduce echo on its own |
| Hexagon acoustic panel | Small accent zones or a sample display wall | Cut pattern makes fitting slower per square metre than flat slat panels |
| Sample panel | Confirming tone and grain before a full order | Shows only a small section, not the finished run |
Verdict: a felt-backed slat panel like Rustic Oak Premium 3-sided veneer is the pick for a studio's client-facing meeting wall — it's the only option on this list doing acoustic and visual work at once.
“A feature wall built in the exact finish you sell is the only sample a client can stand inside.”
Common mistakes design studios make with feature walls
- Ordering a full wall run before checking a physical sample against the studio's own lighting rig, where grain and tone shift more than expected
- Treating a 3D decorative panel as acoustic treatment when it has no felt backing behind it
- Skipping end pieces and trims, leaving a cut edge visible on a wall clients are trained to scrutinise
- Mixing three or more wood finishes on one feature wall, which dilutes the specific look the studio is trying to sell
- Sizing the panel format to the cheaper option instead of the actual ceiling height, leaving a horizontal cut line at eye level
FAQ
What's the best wall panel finish for a design studio showroom?
A felt-backed slat panel in a neutral tone such as Natural Oak or Grey Oak works for most studios because it reads well against any client's mood board while also cutting echo in the meeting room. Darker finishes like Black Oak suit studios pitching moodier, contemporary interiors.
Do 3D decorative wall panels reduce echo the same way slat panels do?
No. Decorative 3D panels like Snowdrop or Gardenia add texture and pattern but carry no acoustic felt backing, so they won't cut reverberation on their own. Pair a decorative accent panel with a felt-backed slat wall in the same room if acoustics matter as much as looks.
Should I order a sample before buying interior design studio wall panels?
Yes, always order a sample first. Wood tone and grain shift under a studio's own lighting in ways a product photo never shows, and a sample is the only way to confirm the finish before committing to a full wall run.
What's the difference between the 240cm and 300cm panel formats?
The 240cm format suits standard ceiling heights, while the 300cm format is built for floor-to-ceiling runs in taller rooms. Choosing the wrong format for the ceiling height leaves an awkward horizontal cut line at eye level.
Can I mix wood finishes on one feature wall?
Two finishes side by side works well to demonstrate contrast to a client, but three or more on one wall usually dilutes the look rather than showing range. Keep additional finishes to separate walls or a dedicated sample section.
Is a felt-backed panel necessary for a reception area?
It depends on how the reception is used. If clients wait or hold short conversations there, felt backing helps; if the wall is purely for first impressions, a decorative 3D panel without backing is enough.
How do I stop a wall panel wall from looking unfinished?
Order matching end pieces and trims for every exposed edge. A cut edge left bare is the fastest way to make an otherwise good feature wall look like a rushed job to a client trained to notice finishes.
One last thing
Decorative 3D panels like Snowdrop and Gardenia carry no acoustic felt backing at all — treat them as texture, not treatment, and pair them with a felt-backed slat wall in the same room if the meeting space still echoes in 2026.