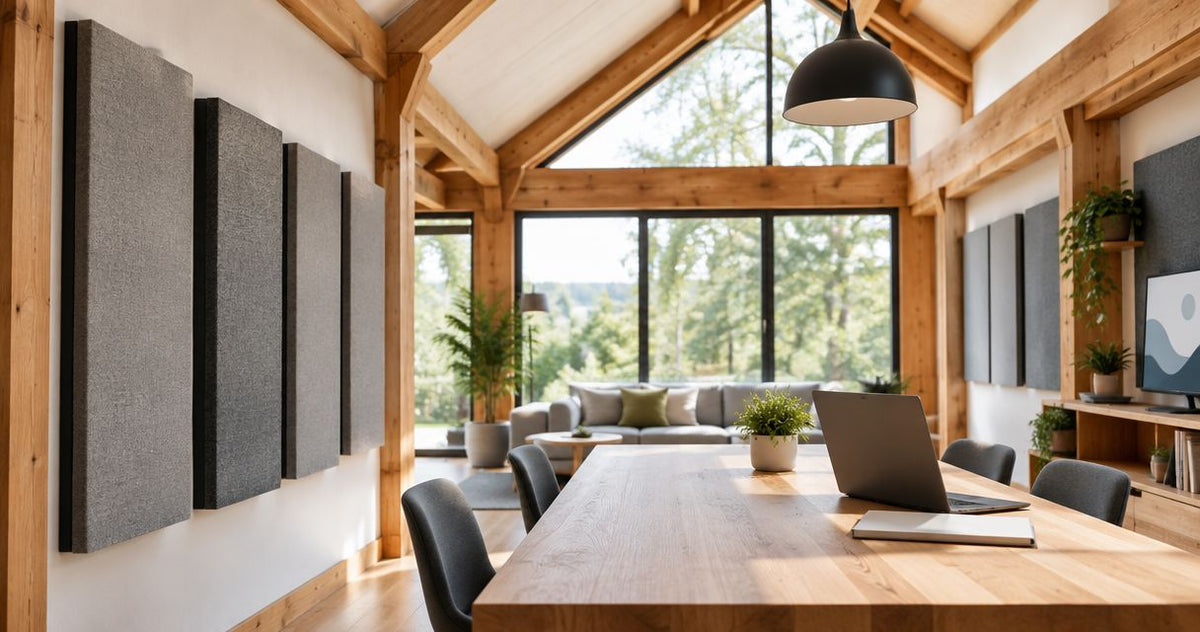
Timber frame builders’ acoustic panelling is an interior sound-absorbing finish aimed at reducing room echo without replacing the wall’s sound insulation. This 2026 guide explains how to select acoustic panels for timber frame builders while protecting the frame’s lining, airtightness details and installation sequence.
- Choose acoustic panels for timber frame builders to control room echo, not to replace sound-insulating wall construction.
- Akustiq UK acoustic wood panels suit timber frame builders seeking decorative interior absorption, subject to project-specific checks.
- Approve the substrate, mounting arrangement and fire documentation before ordering acoustic slat wall panels.
- Coordinate panel layouts with sockets, skirting and service access before closing the timber frame lining.
Why acoustic panelling matters for timber frame builders
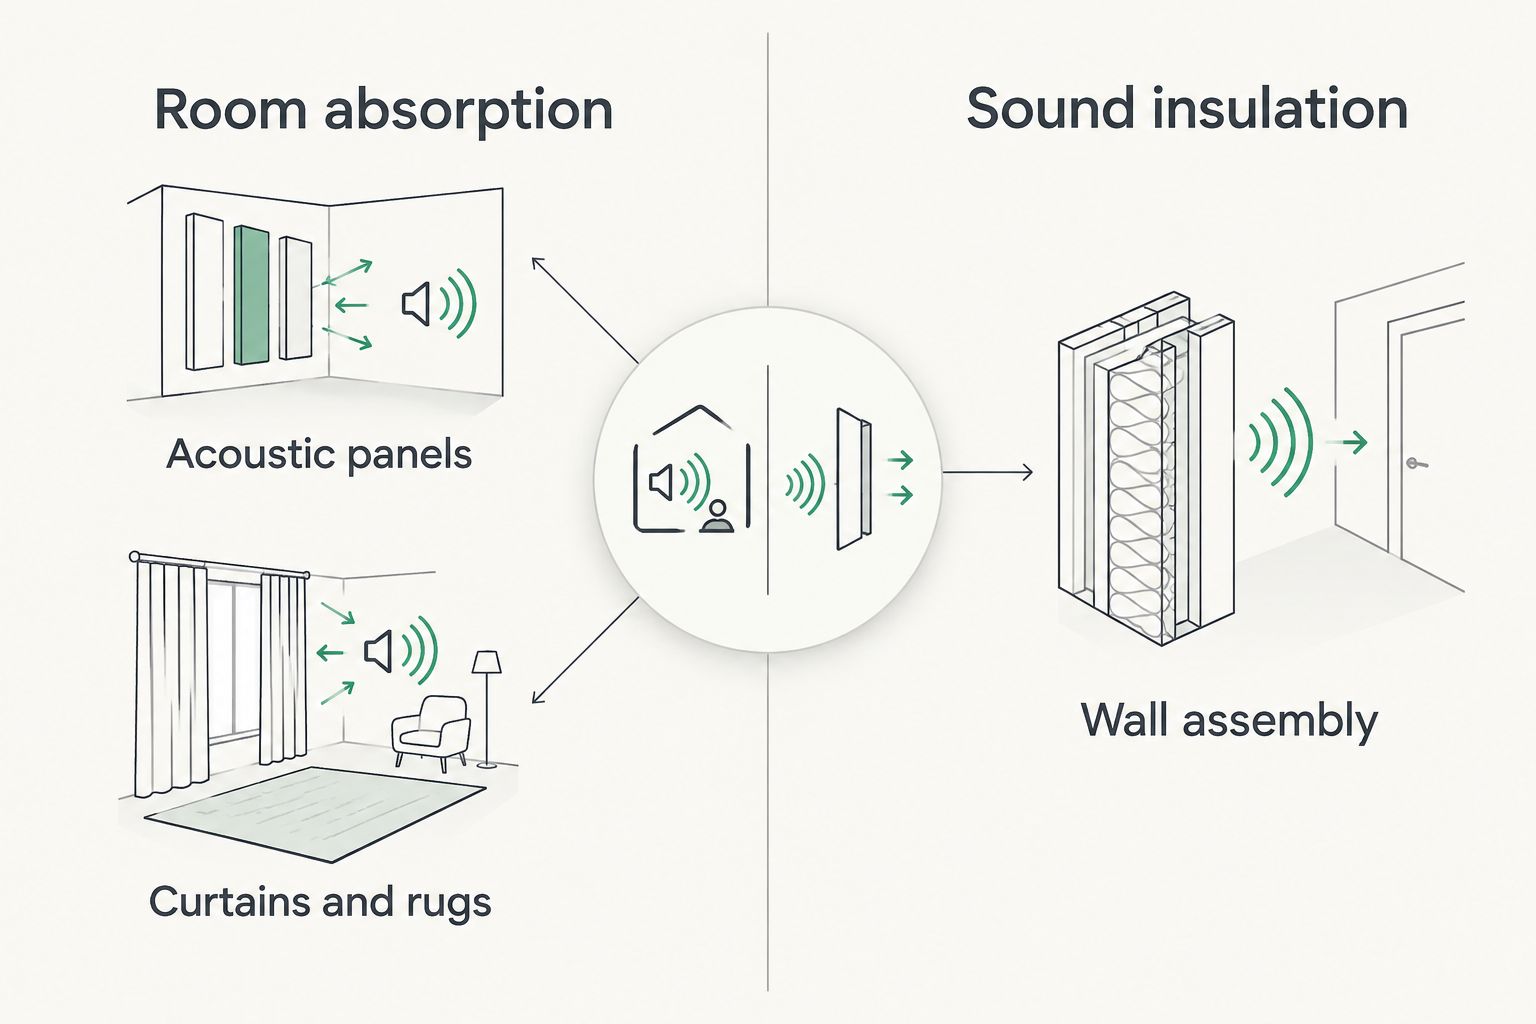
Room absorption and sound insulation solve different problems. Acoustic panels absorb sound within a room; sound-insulating construction limits sound travelling between spaces. A living room that sounds harsh needs a different diagnosis from a bedroom where you hear conversations through a partition.
For timber frame builders, the finish also meets several construction interfaces: plasterboard linings, service cavities, membranes, backing supports and penetrations. Treat the panel as a finish attached to an approved wall assembly, not as permission to change that assembly.
Your acoustic panel specification needs evidence for the actual product and installation. Start with the guide to checking fire ratings for acoustic wood panels, then obtain the documentation needed for your project rather than treating a product description as approval.
In a 2026 specification, keep the distinction explicit: interior absorption belongs in the room-finish package; required separating-wall performance belongs in the wall design. Record both responsibilities before procurement so the builder, designer and client expect the same outcome.
How to specify and fit acoustic panels on timber frame walls
Define the acoustic problem
Start without specialist equipment: walk the rooms, review the drawings and ask the client where sound causes difficulty. Listen to speech in the living room, home office and hallway. A hand clap helps identify an obvious lingering reflection, but it does not measure compliance or establish a treatment quantity.
Separate the brief into room echo, airborne transmission, impact noise and equipment noise. Sound-absorbing wall finishes address the first issue; the others need investigation of their own. Do not sell an echo treatment as a cure for footsteps through a floor or traffic entering through a window.
Write the intended outcome in plain language. Better speech comfort in an open-plan room is a usable brief; an unspecified promise to make the house quiet is not.
- Identify whether the complaint concerns echo or sound entering the room.
- Mark the occupied areas: sofa, dining table, desk and circulation route.
- Record hard finishes, glazing and planned furniture on the room schedule.
- Refer transmission or impact-noise problems to the responsible designer.
Check the wall assembly before choosing fixings
Use the approved wall drawings and site records to identify the substrate. Check whether the fixing zone contains studs, designated backing or a service cavity, and locate the airtightness or vapour-control layer. Never assume that a visible plasterboard surface describes everything behind it.
For your 2026 build, agree the attachment detail before the lining is closed. A fixing that suits the panel still needs a suitable support and must not compromise the wall’s required performance. Confirm product weight, substrate capacity and fixing requirements with the relevant manufacturers and designer.
Adhesive is not a universal substitute for that assessment. Its suitability depends on the panel, surface condition and approved installation method; paint adhesion alone does not establish the capacity of the whole attachment.
- Identify the complete wall build-up and protected layers.
- Locate suitable support without relying on guessed stud positions.
- Agree any additional backing before closing the lining.
- Confirm how permitted penetrations will be sealed or otherwise detailed.
- Record the approved attachment method in the installation instructions.
Select the panel format around the room
Sketch the elevation by hand first. Mark openings, sockets, wall lights, skirting and visible edges, then compare formats against that layout. This costs no software licence and exposes awkward joints before anyone cuts a panel.
Akustiq UK supplies acoustic wood panels for construction and interior applications. Its flagship indoor slat panels have a 3-sided real wood veneer finish and acoustic felt backing, with 240 cm and 300 cm size formats. Choose between those formats using the finished wall dimensions, not the nominal storey height.
The catalogue also includes hexagon panels labelled 81 cm. These offer a different layout choice, but scattered shapes and continuous slat panelling do not cover the same wall area. Akustiq UK acoustic wood panels are best for timber frame builders seeking a decorative interior absorption finish, not a replacement for sound-insulating construction.
- Measure from the finished floor and agreed skirting line.
- Compare 240 cm and 300 cm formats against each elevation.
- Confirm width, thickness and usable dimensions for the selected product.
- Use samples to check veneer and felt against neighbouring finishes.
- Draw joints, exposed edges and service cut-outs before ordering.
Match acoustic evidence to the proposed installation
Read the technical information yourself before making a performance promise. Ask for the absorption test report and check the tested mounting arrangement: direct attachment, a cavity behind the panel or another specified construction. A result belongs to that tested arrangement, not automatically to every way of fitting the panel.
For the 2026 technical submission, distinguish a sound absorption rating from sound reduction between rooms. Neither a material name nor an attractive slat finish establishes a room’s final acoustic performance. Panel area, placement, room volume and other surfaces all affect the result.
Where the brief has a measured acoustic target, ask an acoustician to determine the treatment. A catalogue rating alone cannot tell you how much wall to cover. Keep the approved treatment area separate from the decorative layout so value-engineering does not quietly remove necessary absorption.
- Obtain the report for the exact selected panel construction.
- Compare the tested mounting with the proposed wall detail.
- Check frequency-dependent results where the acoustic brief requires them.
- Obtain project-specific advice for measured performance targets.
- Record treatment area and mounting requirements in the specification.
Coordinate services and exposed edges
Dry-set the layout using a measured drawing or physical templates. Start from a deliberate datum rather than whichever corner the installer reaches first. The aim is to finish neatly at the opposite edge while keeping sockets and switches accessible.
Panel depth changes the relationship between the wall face and electrical accessories. Have the electrician approve the detail; do not bury an accessory behind the finish or improvise extensions. Keep access to valves, inspection points and equipment that needs maintenance.
A living-room media wall also needs a separate support detail for the television and shelves. Decorative acoustic panels are not evidence of load-bearing capacity. Plan substantial attachments into suitable support, and coordinate them with the panel layout before installation.
- Mark sockets, switches and wall lights on the elevation.
- Agree electrical accessory details with the electrician.
- Show access panels and removable areas where maintenance requires them.
- Detail internal corners, external corners and exposed panel ends.
- Provide independent support for televisions, shelving and heavy fittings.
Prepare the substrate and install to the approved method
Inspect the wall before unpacking panels for fitting. Check flatness, surface condition and the completion of work behind the finish. Do not use decorative panelling to conceal unresolved dampness, damaged lining or unfinished service details.
Follow the selected product’s conditioning, storage, cutting and installation instructions. Do not impose a generic acclimatisation period or screw spacing from another product. Timber frame movement and junction detailing also belong with the project designer, particularly where panelling meets other construction.
Build a trial section where the finish has difficult corners or prominent joints. It gives the client a physical reference and lets the installer resolve alignment before continuing across the wall. Keep cutting dust away from occupied areas and use the controls appropriate to the material and task.
- Inspect and accept the substrate before panel installation.
- Complete and photograph concealed details before covering them.
- Follow the product-specific storage and conditioning instructions.
- Use the approved attachment method and suitable cutting equipment.
- Check alignment and edge treatment on a trial section.
Verify the result and hand over the wall details
Start with a visual inspection and a repeat listening check under comparable room conditions. Confirm that joints, fixings, edges and service access match the agreed layout. Furniture and curtains change room absorption, so distinguish the unfinished room from the intended occupied setting.
For a 2026 handover, provide the panel identity, mounting detail and care instructions alongside the room-finish schedule. Where the contract specifies acoustic testing, use the agreed measurement method and acceptance criteria. A quieter-sounding room is not a substitute for required testing of a separating wall or floor.
Keep photographs of concealed backing and services with the handover information. Future installers need to know where they can attach fittings and where protected layers sit. That record supports later alterations without relying on memory or destructive investigation.
- Inspect panel alignment, edges and accessible electrical fittings.
- Complete any acoustic testing required by the project brief.
- Record the exact panel and approved mounting arrangement.
- Hand over care instructions and concealed-work photographs.
- Explain that room absorption does not establish sound insulation compliance.
Compare acoustic treatment options for timber frame interiors
Choose the option by its role in the room, then check the installation evidence. The table compares finish types rather than ranking products by an unsupported performance claim. No option below replaces the required wall assembly.
| Option | Best for | Practical advantage | Key limitation |
|---|---|---|---|
| Akustiq UK acoustic wood slat panels | Decorative interior absorption with a wood finish | Combines real wood veneer, slat detailing and acoustic felt backing | Project suitability depends on mounting, treatment area and required documentation |
| Acoustic hexagon panels | Patterned feature areas in a living room or home office | Allows a layout based on individual shapes | A small decorative arrangement is not evidence of sufficient absorption |
| Fabric-faced acoustic panels | Rooms where the designer wants a fabric finish | Provides an alternative to visible wood slats | Fire, durability and acoustic evidence must match the selected product |
| Curtains and rugs | Initial treatment of hard domestic interiors | Adds absorption without altering the wall lining | Depends on furnishings and does not replace specified fixed treatment |
Choose continuous slat panelling when the wood finish is part of the brief; choose other treatment types when their finish and documented performance better match the room. For every option, assess maintenance, exposed edges and installation responsibilities as well as appearance.
The mounting arrangement is a decision point in its own right. Separate the room’s absorption requirement from the wall’s sound-insulation requirement before comparing finishes.
Common mistakes timber frame builders make
Treating absorption as separating-wall performance
A felt-backed decorative panel does not establish the sound insulation of a partition. Keep the tested wall construction intact and assess sound transmission separately. Describe the finish to the client as room treatment, not as proof that neighbouring rooms will be inaudible.
Choosing screws before locating protected layers
A longer fixing is not automatically a better fixing. Approve the support, penetration depth and sealing detail against the actual wall assembly. When suitable backing is needed, arrange it during construction rather than improvising after the decorated lining is complete.
Applying a test rating to a different mounting
Direct fitting and fitting over a cavity are different arrangements. Check which construction the acoustic report describes, then specify that construction or obtain advice on the proposed alternative. Never transfer a headline rating to an unverified installation just because the visible panel is the same.
Ordering from nominal ceiling heights
Finished floors, skirting, ceiling junctions and uneven surfaces determine the cut length. Measure the finished elevation and plan where any horizontal joint will sit. Check transport and handling access too, especially where longer panels must pass through stairs, corridors or completed rooms.
Leaving compliance and maintenance until handover
A wood finish is not evidence of a particular reaction-to-fire classification, moisture suitability or cleaning regime. Obtain the relevant documents before selection, especially for shared circulation areas and commercial interiors. Keep indoor acoustic panels separate from exterior cladding specifications; the products have different roles.
FAQ
What are the best acoustic panels for timber frame builders?
The best acoustic panels for timber frame builders are those with evidence matching the room brief, wall substrate and proposed mounting. Akustiq UK acoustic wood panels suit decorative interior absorption, but project suitability still requires acoustic, fire and fixing checks.
Will acoustic wood panels soundproof a timber frame wall?
Acoustic wood panels alone do not establish soundproofing of a timber frame wall. They address sound absorption within a room; transmission between rooms depends on the complete wall construction and its junctions.
Can I fix acoustic panels directly to plasterboard?
Use direct fixing to plasterboard only when the panel instructions, substrate capacity and project wall detail support it. Confirm the attachment method and the location of protected layers before drilling or applying adhesive.
Should I choose 240 cm or 300 cm acoustic panels?
Choose 240 cm or 300 cm panels using the finished wall elevation and planned joints. Check the selected product’s usable dimensions and handling route rather than ordering from the nominal ceiling height.
Do acoustic panels need battens on a timber frame wall?
Battens are required only when the approved installation or acoustic design calls for them. Match the proposed mounting to the product instructions and acoustic test arrangement instead of assuming battens are always necessary.
Can acoustic panels replace the plasterboard lining?
Do not replace a specified plasterboard lining with decorative acoustic panels unless the wall designer approves an alternative assembly. The lining can contribute to required fire, acoustic and other wall performance.
How much wall area should I cover with acoustic panels?
Determine coverage from the room’s acoustic brief rather than a universal percentage. A measured target needs assessment of room volume, existing finishes, panel absorption and the proposed mounting.
Can indoor acoustic panels also be used as exterior cladding?
Specify indoor acoustic panels and exterior cladding separately. Obtain documentation for the intended environment and do not assume an interior wood-and-felt panel is suitable outside.
One last thing
Keep a photograph of the wall before the acoustic finish covers it. Include the backing locations, service routes and protected-layer details in the project record, not just a photograph of the finished feature wall.
For timber frame projects completed in 2026, this is a useful handover addition: a future television bracket or shelving installation needs the concealed construction information, not merely the panel finish name. Record the approved fixing zones while they are still visible.