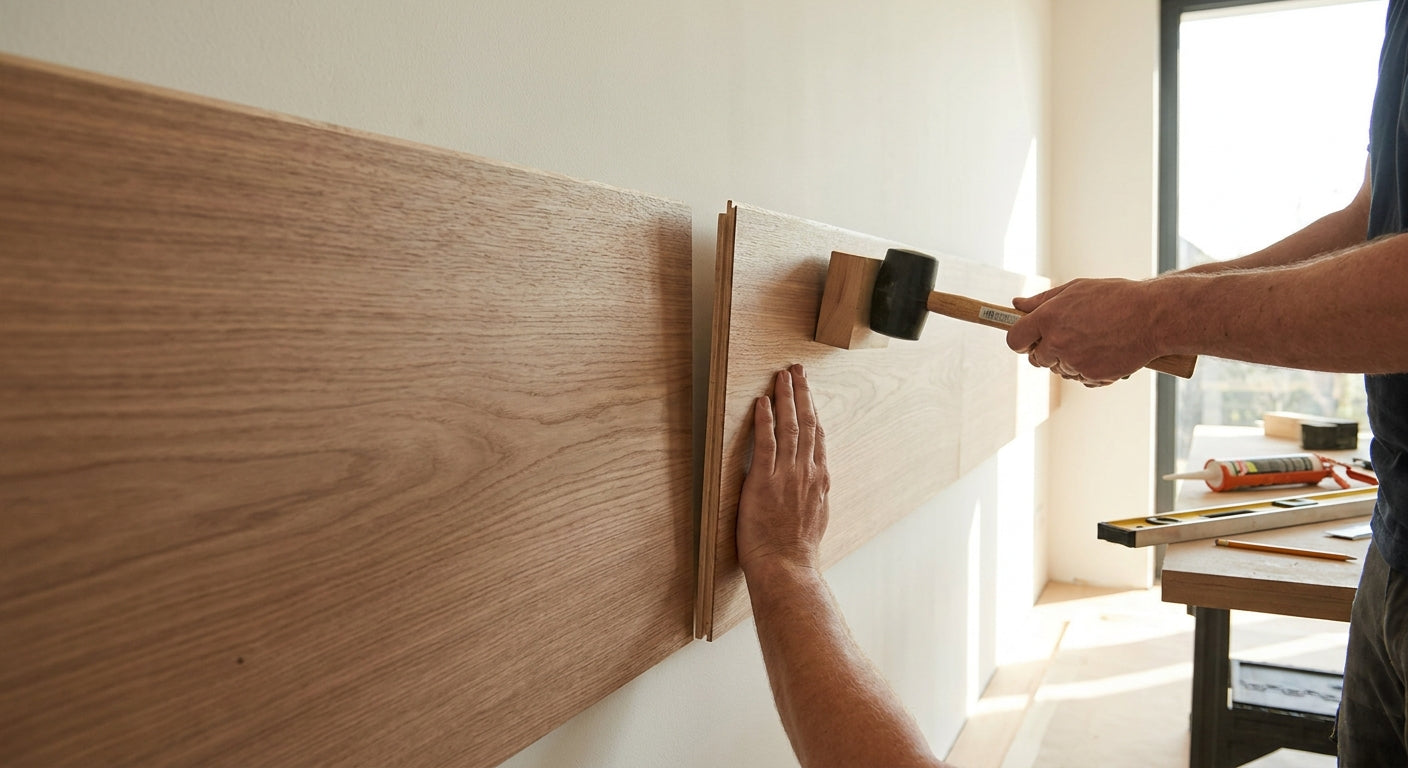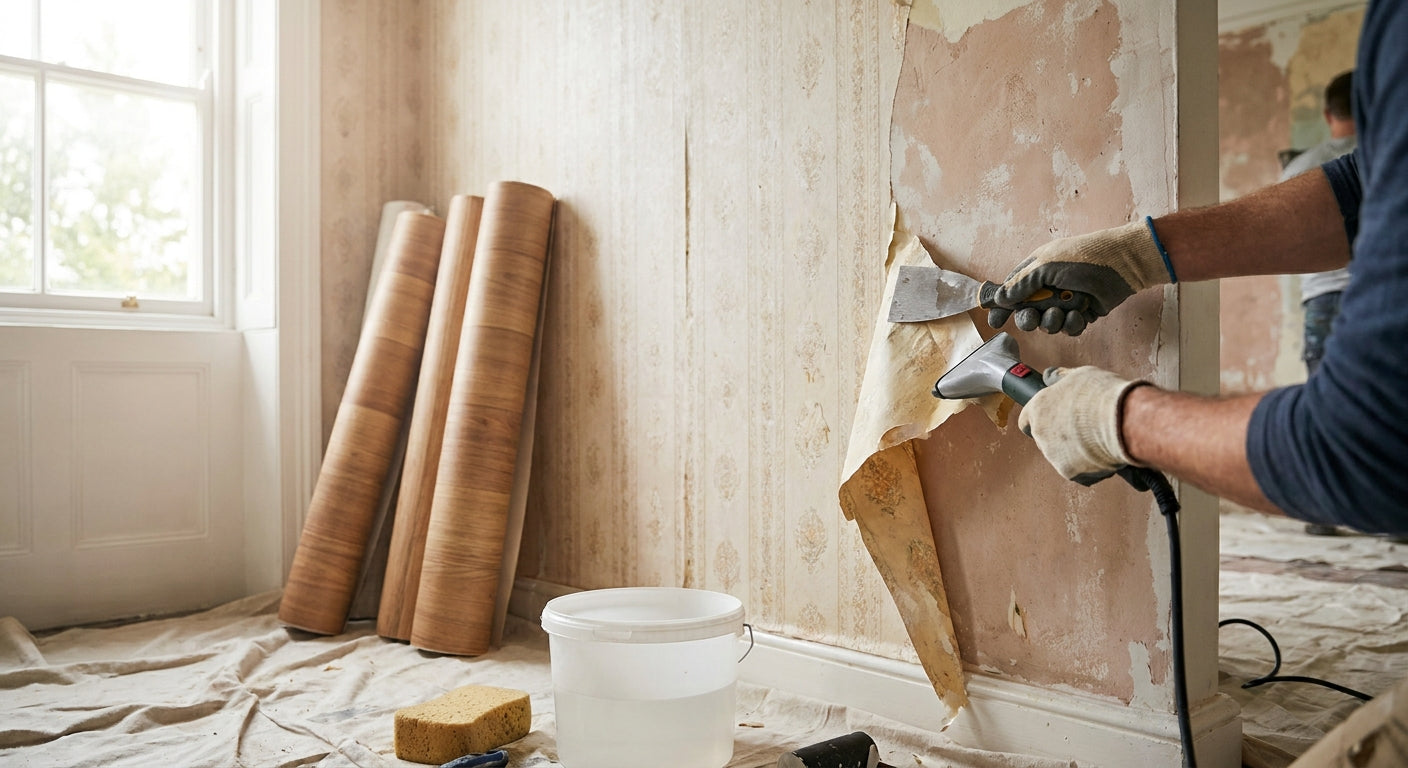
Stripping old wallpaper properly before fitting wall panels is the single step that decides whether your acoustic panels sit flat for years or bubble and separate within months.
- Soak wallpaper for 15 minutes before scraping - dry scraping tears the top layer and leaves backing paper stuck to the wall.
- Let plaster or filler cure 24-48 hours before fitting panels; damp walls warp veneer and voids adhesive.
- A 2mm expansion gap around every panel edge stops swelling in humid rooms - skipping it is the top cause of buckling.
- AKU Woodpanel's high-tack glue only bonds to a clean, dry substrate - wallpaper paste residue is the #1 install failure in 2026 support tickets.
Why this matters
Acoustic wood panels rely on full-surface adhesive contact plus a flat, dry substrate to hold their acoustic felt backing tight against the wall. Old wallpaper paste, lining paper fibres, or a skim of vinyl coating sitting between the wall and the panel breaks that contact.
Once the bond fails at even one corner, the whole panel bows outward and the seams between adjacent panels open up - which is exactly the visual and acoustic problem the panel was meant to solve. Every panel and cladding option on AKU Woodpanel assumes a bare, sound substrate, so wallpaper removal is not optional prep, it's the first fixing step.
Most DIY panel failures traced back through 2026 customer photos share one root cause: panels glued straight over old paste without a scrape-and-wash cycle first.
What you'll need
- A wallpaper steamer or a garden sprayer for hot water and fabric softener solution
- A stiff scraper (broad, flexible blade, not a filling knife)
- Fine-grit sandpaper (120-180 grit) for smoothing residue
- A sponge and bucket for washing down paste
- Filler and a sanding block for gouges or plaster chips
- A moisture meter, or at minimum patience for a 24-48 hour dry-out window
- A tube of high-tack panel glue once the wall is ready for panel fitting
- A spirit level and tape measure for marking panel lines


The steps
1. Score the surface
Run a scoring tool or serrated scraper across the wallpaper in a diamond pattern so soaking solution can reach the paste layer underneath. Vinyl and paper-backed wallpapers seal water out otherwise, and you'll spend twice as long scraping dry.
Common mistake: pressing too hard and gouging plasterboard through the scoring pass - keep the blade angle shallow, closer to 15 degrees than 45.
2. Soak for 15 minutes, section by section
Apply hot water with a squirt of fabric softener (or a wallpaper stripping solution) to a 1m by 1m section and leave it for 15 minutes before touching it. Working larger areas at once means the first section dries out before you get a scraper to it.
Expected outcome: the paper edges lift and curl visibly at the scored lines - if they don't, give it another 5-10 minutes rather than forcing the scraper.
3. Scrape at a shallow angle
Hold the scraper at roughly 30 degrees to the wall and push upward under the softened paper rather than digging in flat. This lifts the paper and paste together instead of shaving the plaster skin off with it.
Common mistake: gouging the plasterboard face paper - any nick here needs filling before panels go up, because panels will telegraph the dip once glued.
4. Wash down paste residue
Wipe the entire wall with a clean, damp sponge to lift leftover paste film, changing the water every couple of sections. Dried paste left behind reads as a slightly tacky, uneven sheen once the wall dries - that's exactly the film that stops panel glue from bonding.
Expected outcome: a matte, uniform plaster or plasterboard surface with no shiny patches under raking light.
5. Fill, sand, and flatten
Fill any gouges, old picture-hook holes, or scraper nicks, then sand flush once cured. Wall panels are rigid, so they bridge over small dips instead of following them, which shows up as a visible shadow gap along the panel edge.
Before committing to a skim coat across a full wall, check flatness with a straightedge in both directions - an inconsistent plaster line is the main reason panels ripple along a run. Getting a consistent finish across anything wider than 3 metres comes down to levelling the plaster with a cross-line laser rather than eyeballing it by torchlight, since shadow lines hide dips that daylight reveals later. See levelling the plaster for the fixing method that keeps a long run true.
6. Let the wall dry fully
Give filled and washed walls 24-48 hours before fitting anything, longer in an unheated room or over winter months. A moisture meter reading under 16% on plasterboard, or a wall that feels genuinely cool and dry to the back of your hand, is the practical test if you don't have one.
Common mistake: fitting panels the same afternoon because the surface looks dry - trapped moisture behind a glued panel has nowhere to go and will bow the veneer within a week.
7. Mark out and dry-fit before gluing
Measure your wall width and mark vertical guide lines at panel width intervals, checking level every time - a wall that looks square rarely is. Dry-fit the first panel against the wall without adhesive to confirm the wallpaper is fully gone and the surface is smooth enough that the panel sits flush at every edge.
If you're fixing to a plasterboard partition rather than solid masonry, fitting panels to a plasterboard wall needs different fixings than brick or block, so confirm your wall type before you commit to glue alone.
Troubleshooting
- Paper won't lift even after soaking - it's likely a vinyl-coated or painted-over wallpaper sealing water out. Score more aggressively and use a steamer instead of a sprayed solution.
- Plasterboard face paper tears with the wallpaper - stop immediately, let the area dry, and skim-fill rather than continuing to scrape; panels will show every torn patch as a dip.
- Wall feels damp 48 hours later - check for a leaking pipe or condensation source before assuming it's residual stripping water; panels glued to a genuinely damp wall will fail regardless of how long you wait.
- Faint paste sheen after washing - go over the wall again with a diluted sugar soap solution; leftover paste is the most common reason adhesive won't grab in year-one warranty claims.
- Uneven wall after stripping - use choosing the right fixings as your reference before deciding between direct glue-up and a batten system, since a wall out by more than 5mm across 2 metres usually needs battens rather than adhesive alone.
- Panel edges gap after fitting - check you left the 2mm expansion gap; panels glued edge-to-edge with zero clearance buckle the first time the room's humidity rises in summer 2026.
Tools and resources
- Wallpaper steamer or garden sprayer, stiff scraper, 120-180 grit sandpaper
- Filler, sanding block, moisture meter
- High-tack panel glue for the final fitting stage
- A spirit level and tape measure for marking panel lines before any adhesive goes on
What to do next
Once the wall is stripped, filled, and dry, don't jump straight to a full panel order. Ordering panel samples first against your now-bare wall shows you the true finish tone under your room's actual light, which is impossible to judge accurately over old wallpaper colour.
FAQ
Do you have to remove wallpaper before fitting wall panels?
Yes, in almost every case. Wallpaper paste and lining paper create an unstable surface that panel adhesive won't bond to properly, and panels glued over paper commonly bow or separate within a few months.
How long should you wait after stripping wallpaper before fitting panels?
Wait 24-48 hours minimum after washing and filling the wall, longer in cold or unheated rooms in 2026's winter months. Fitting panels onto a damp substrate is the main cause of veneer warping.
Can wall panels go directly over wallpaper paste residue?
No - even a faint tacky sheen of leftover paste stops high-tack panel glue from gripping the substrate. Wash the wall with diluted sugar soap until it's matte and residue-free before fitting.
What's the best way to soften old wallpaper for removal?
Score the surface first, then soak with hot water and a splash of fabric softener for 15 minutes per section. Vinyl-coated papers need a steamer since sprayed solution can't penetrate the coating.
How much of a gap do you need between wall panels?
Leave a 2mm expansion gap at every panel edge to allow for natural wood movement with humidity. Skipping this gap is the most common cause of panels buckling after installation.
Is it better to glue panels or use battens on an uneven wall?
If the wall is out by more than 5mm across a 2-metre span, battens correct for the unevenness better than adhesive alone. A straightedge check across the wall in both directions tells you which method to use.
Do acoustic wall panels need a moisture check before fitting?
Yes - a moisture reading under 16% on plasterboard is the practical threshold before gluing panels. Fitting onto a wall that reads higher traps moisture behind the veneer with nowhere to escape.
One last thing
The detail most DIY installers skip isn't the stripping, it's the drying window - a wall that looks and feels dry to the touch can still read above 16% moisture on a meter, and that's the gap between a panel that lasts a decade and one that bows in month two.