

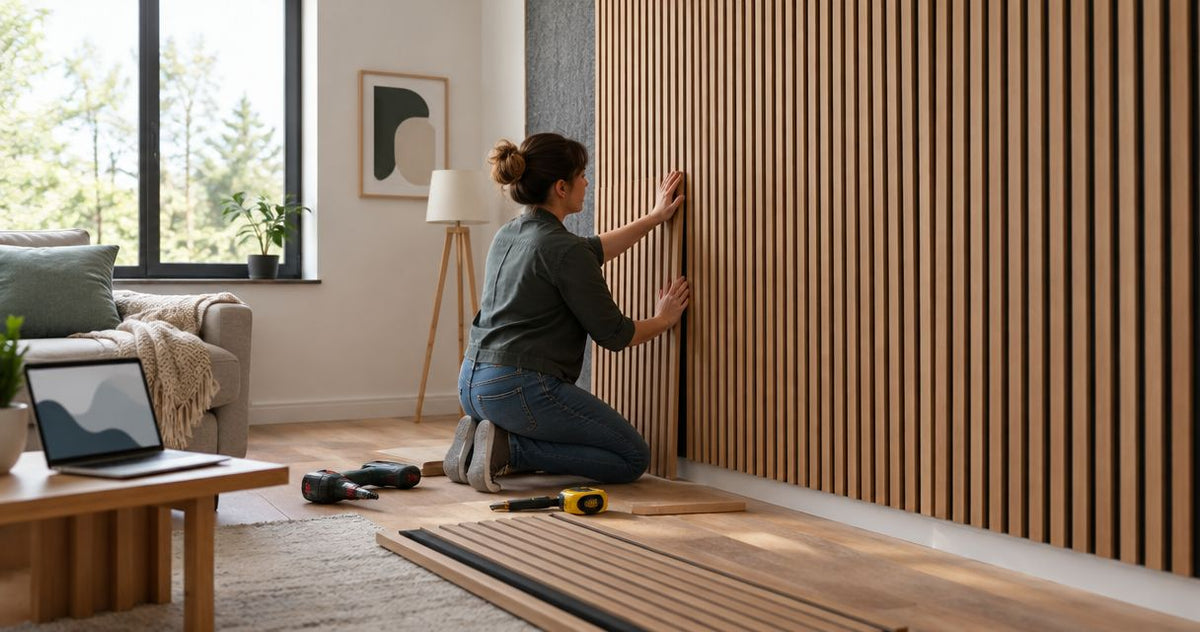
Self-build homeowners’ acoustic wood panelling is an interior wall treatment that combines timber-faced slats with sound-absorbing backing to reduce room reflections and create a finished feature wall. This 2026 guide explains how to plan acoustic wood panels for self-build homeowners around room use, finished dimensions, services and installation—not just colour.
- Acoustic wood panels for self-build homeowners address room echo, not sound transmission through the building structure.
- Akustiq UK acoustic wood panels suit self-build homeowners wanting wood-finished room treatment, not structural soundproofing.
- Plan acoustic wall panels alongside sockets, skirting, lighting and joinery before closing up the wall.
- Choose panel coverage and mounting from acoustic evidence; a wood finish alone does not establish performance.
Why acoustic wood panels matter for self-build homeowners
A self-build gives you control over wall construction, electrical positions and interior finishes before installation. Use that opportunity to plan an acoustic feature wall as part of the room, rather than adding it after sockets, cabinetry and skirting are fixed.
Hard floors, glazing and bare walls reflect sound. In a living room, those reflections affect conversation and TV listening; in a home office, they colour the sound picked up by your microphone. Absorptive treatment addresses those reflections, but it does not replace the construction details that limit noise between rooms.
For a 2026 self-build, separate acoustic comfort from sound isolation before specifying panels. The first concerns sound within the room. The second concerns sound travelling through walls, floors, doors and other paths.
That distinction protects your specification. A bedroom beside a noisy utility room needs attention to the separating construction, while an echoing dining area needs a room-treatment plan. Some projects need both.
How to plan and fit acoustic wood panels
1. Set your room priorities
Start with your floor plan and a written description of each problem. Identify where you will talk, listen, work or sleep, then distinguish reflected sound from noise entering the room. You do not need a purchasing decision to complete this exercise.
Prioritise rooms by use rather than by the size of the empty wall. An open-plan kitchen and living room requires a different brief from a bedroom headboard wall. For a demanding home cinema or music room, ask an acoustician to assess the space before choosing treatment.
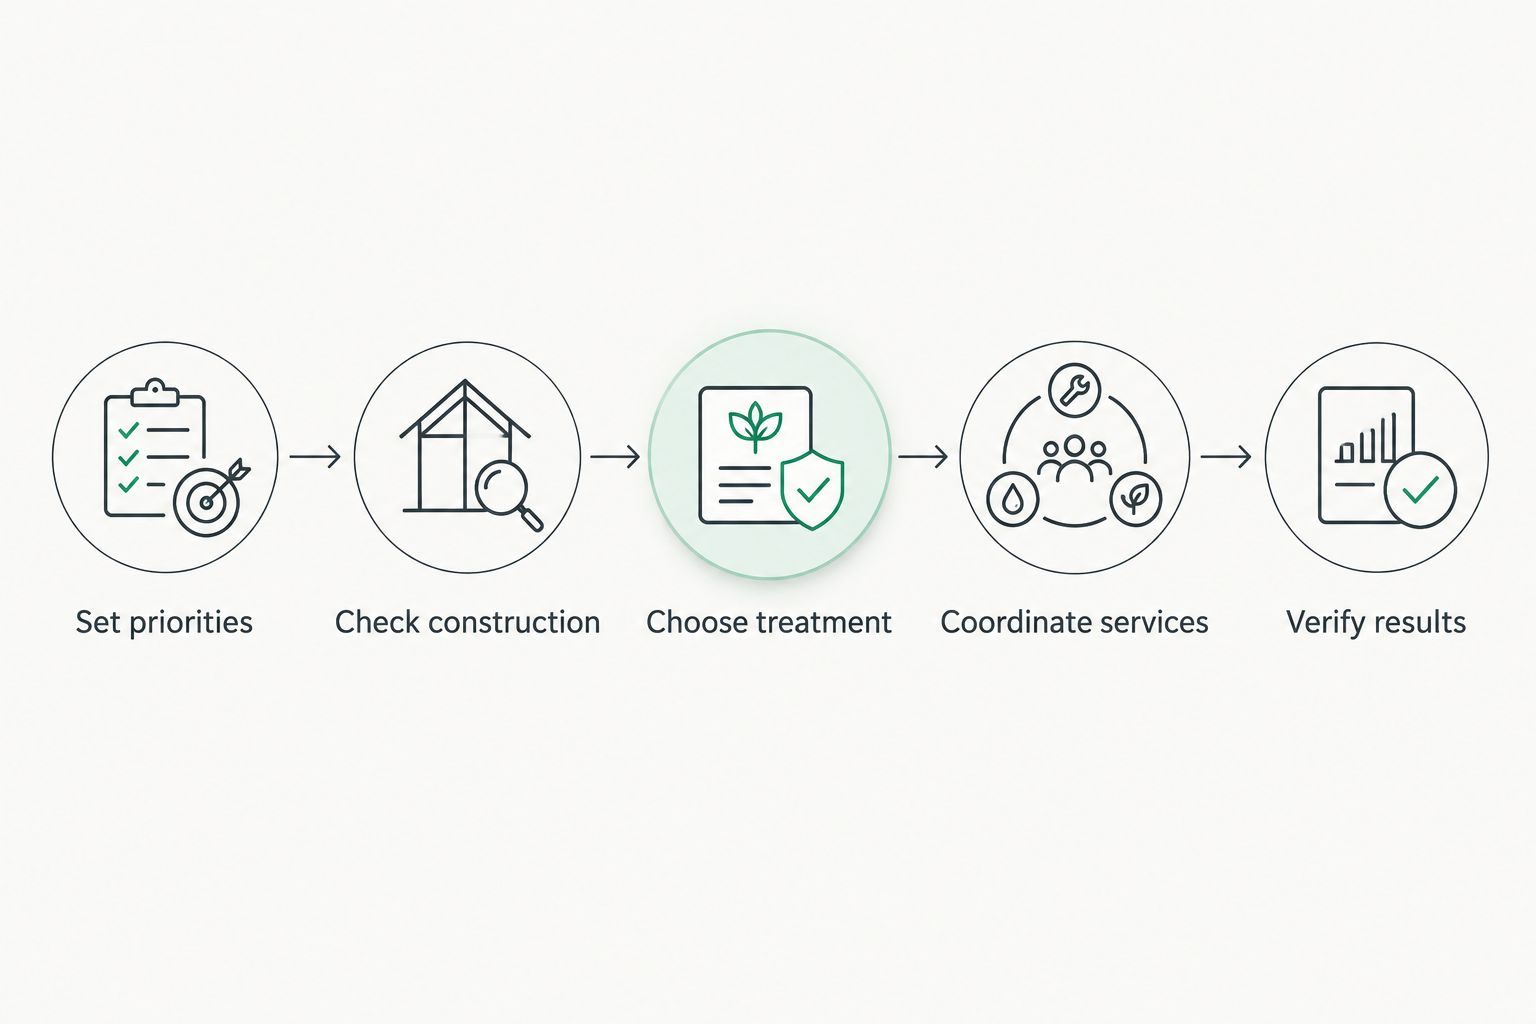
Keep the sequence simple: set priorities, check construction, choose treatment, coordinate services and verify the result. Each decision informs the next.
Turn your room brief into concrete actions:
- Mark conversation, TV and desk positions on the plan.
- Record whether the problem is echo, incoming noise or both.
- Identify hard surfaces and planned soft furnishings.
- Flag cinema, music and privacy requirements for specialist advice.
2. Check the wall construction and room conditions
Read the wall specification before choosing a fixing method. Plasterboard, masonry and a battened lining need different fixing details; the visible surface does not tell you everything about the support behind it. Confirm the actual build-up with your contractor.
Also establish whether the wall forms part of a fire-resisting construction, an airtightness layer or a moisture-control detail. Decorative work must respect those functions. Do not assume a panel finish permits penetrations through a membrane or changes to a tested wall assembly.
In your 2026 construction programme, place interior panelling after the substrate and room conditions meet the manufacturer’s installation requirements. Do not use panels to conceal damp, loose plaster or an unresolved wall defect.
- Record the substrate and available fixing support.
- Locate cables, pipes and concealed membranes before drilling.
- Resolve damp, loose finishes and significant unevenness.
- Ask your designer about fire, airtightness and moisture constraints.
- Confirm room suitability, especially near heat or water.
3. Choose the finish and verify acoustic evidence
Compare finishes manually using samples against your flooring, doors and cabinetry. Look at them in daylight and under the lighting you intend to install. A photograph cannot show how the combination reads in your actual room.
Akustiq UK acoustic wood panels suit self-build homeowners wanting wood-finished room treatment, not structural soundproofing. The indoor range described by the brand combines acoustic felt backing with a 3-sided real wood veneer finish, with 240 cm and 300 cm size formats. These details help you shortlist a panel; they do not establish its performance in your proposed installation.
One option is the Natural Oak Grey Felt wooden wall panel, whose supplied product description identifies acoustic slats and 3-sided wood veneer. Its suitability still depends on your room, mounting detail and required performance.
Ask for acoustic test evidence that identifies the mounting arrangement. Results for one backing cavity or supporting assembly are not interchangeable with every installation.
- Compare samples beside permanent finishes.
- Check the felt colour as well as the veneer.
- Request acoustic evidence for the intended mounting method.
- Review fire documentation separately from acoustic documentation.
- Confirm cleaning and room-use requirements before specifying.
4. Measure finished dimensions and draw the panel layout
Measure from the intended finished floor level to the intended ceiling or stopping point. Structural dimensions are not enough when flooring, plaster, skirting or a dropped ceiling still needs fitting. Mark the proposed panel area on an elevation drawing.
Akustiq UK lists 240 cm and 300 cm indoor size formats; the difference is 60 cm. Compare both against the finished height, handling route and proposed cuts. A longer format is not automatically the better choice if the wall contains awkward openings or the route into the room restricts handling.
Use the confirmed panel width to calculate coverage. Divide the planned run by that width, round up to whole panels, then check the cutting layout. Calculate waste from actual cuts rather than applying an unsupported allowance.
- Measure the wall at several positions.
- Mark skirting, ceiling lines and exposed edges.
- Draw joints around doors, windows and recesses.
- Check whether offcuts fit another planned section.
- Confirm access through doors, stairs and landings.
5. Coordinate sockets, lighting and fitted furniture
Use a paper elevation or your designer’s room drawing to position services before purchasing. Show the finished panel face, not just the existing wall surface. The installer and electrician need to understand how switches, sockets and fittings will meet that face.
TV brackets, shelving and cabinets need suitable structural support. Do not treat the decorative slats as a fixing base for heavy loads unless the relevant manufacturer explicitly permits that arrangement. Plan access to cables and connections rather than permanently enclosing them.
A panelled wall behind a desk or sofa is easier to resolve when furniture positions are settled. In a kitchen, distinguish a dry feature wall from areas exposed to splashing, cooking heat or grease, and verify suitability for the exact location.
- Mark sockets, switches and controls on the elevation.
- Agree electrical alterations with your electrician.
- Provide independent support for heavy fixtures.
- Keep service connections and necessary access reachable.
- Check clearances around doors, radiators and furniture.
6. Agree the mounting detail and installation sequence
Read the installation instructions before deciding between direct fixing and a supported mounting arrangement. Compare those instructions with the acoustic test assembly and your substrate. Do not improvise cavity depths, adhesive quantities or screw spacing from a generic guide.
Prepare a written installation brief for your 2026 fit-out. Include the approved fixing method, edge treatment, cut locations and responsibility for service alterations. A small trial section helps you check alignment and cutting technique before committing to the main wall.
The finished edge deserves as much attention as the centre of the wall. An exposed end beside a doorway or cabinet will remain visible, so decide its treatment before cutting panels.
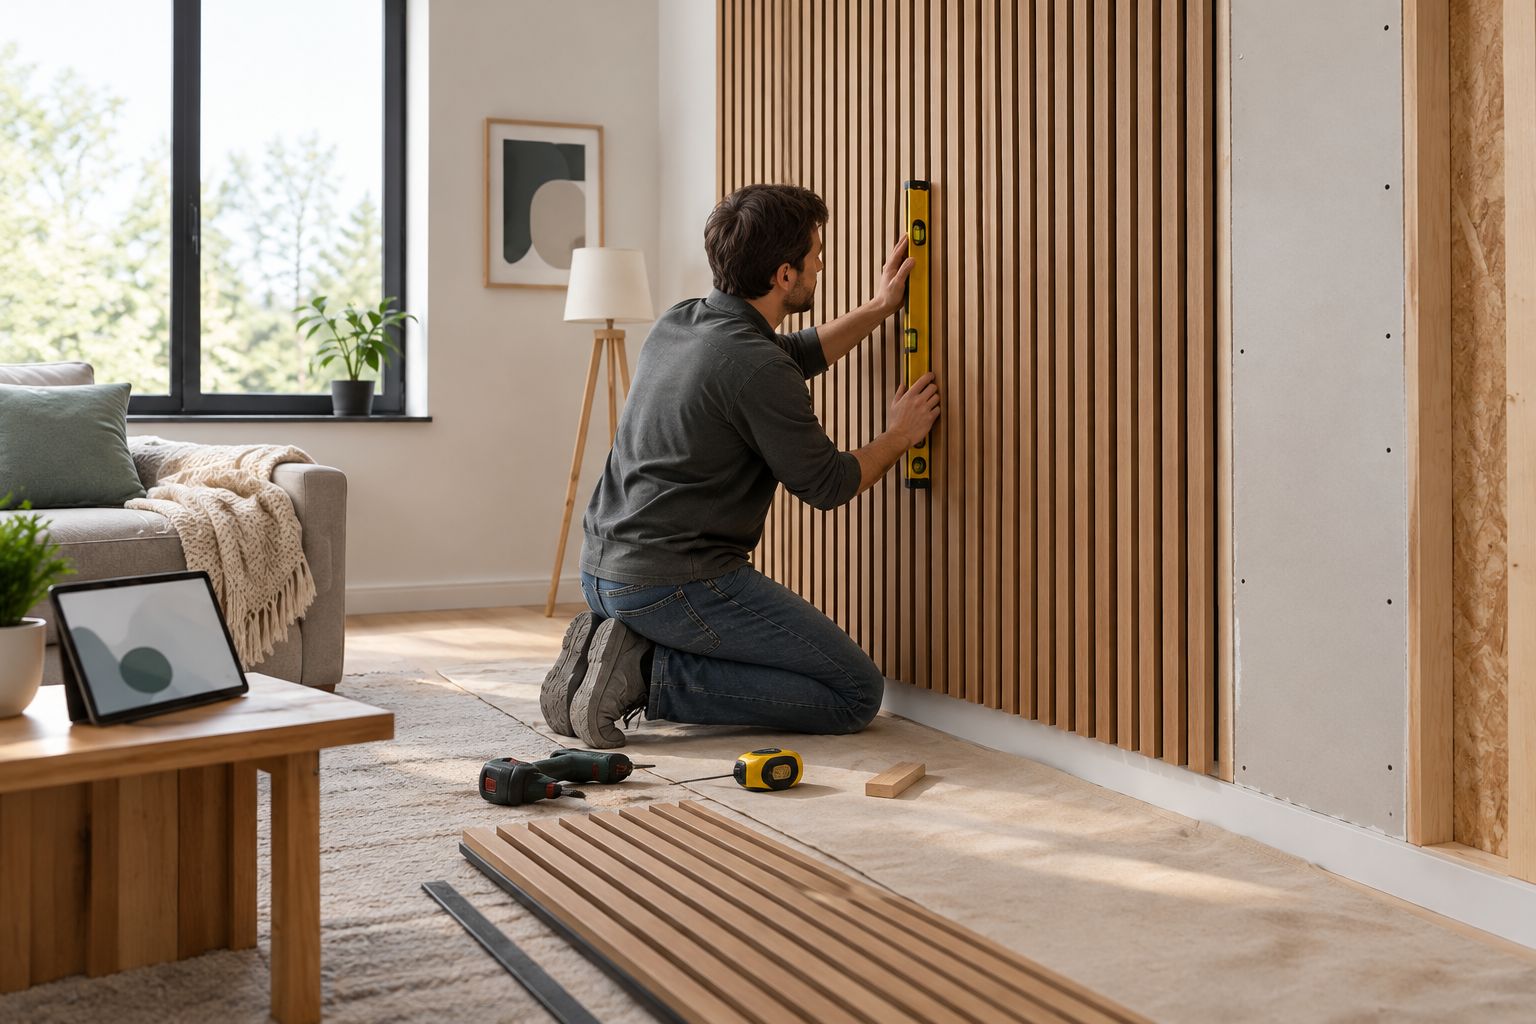
Finish the installation brief with these checks:
- Use substrate-appropriate fixings specified for the installation.
- Follow the panel instructions for preparation and acclimatisation.
- Agree safe cutting methods and dust control.
- Dry-position the opening section and check alignment.
- Confirm trims, exposed ends and service access.
7. Verify the result in the furnished room
Assess the room after the planned furniture and soft furnishings are in place. An empty shell and a furnished living room do not have the same acoustic conditions. Listen from your normal seating or desk position, not only beside the treated wall.
Use consistent speech, TV content or a recording setup for a practical before-and-after check. A phone recording helps document your impression, but it is not a substitute for calibrated acoustic measurement. If the specification includes a measurable acoustic target, arrange appropriate testing.
Keep the installation information with your 2026 handover documents. Future electricians, decorators and owners need to know where supports, cables and removable sections sit.
- Compare listening conditions using the same positions and content.
- Check conversation and TV clarity at normal listening levels.
- Inspect joints, cuts, fixing security and accessible services.
- Record the approved mounting detail and concealed supports.
- Seek acoustic advice if the original problem remains.
Compare the options for your self-build
Choose the treatment by the problem it solves, then choose the finish. The options below are not direct substitutes: some absorb room reflections, while others address sound transmission or appearance.
| Option | Best for | Practical advantage | Key limitation |
|---|---|---|---|
| Akustiq UK acoustic wood panels | Self-build homeowners wanting timber-faced room treatment | Combines wooden slats, felt backing and an interior feature finish | Acoustic results depend on coverage and mounting; it is not a complete sound-isolation system |
| Curtains, rugs and upholstered furniture | Furnished living rooms with hard reflective surfaces | Adds absorption through useful everyday furnishings | Placement and acoustic effect depend on the materials and room layout |
| Specialist wall or ceiling absorbers | Rooms with a defined acoustic brief | Allows treatment to be selected around documented performance | Requires suitable placement and integration with the interior design |
| Sound-isolating wall and floor construction | Bedrooms, offices or other rooms needing separation from noise | Addresses sound transmission through the building assembly | Needs coordinated construction details; decorative panels cannot replace it |
| Decorative wood panelling without acoustic evidence | Walls where appearance is the main requirement | Provides a wood-finished interior surface | Appearance alone does not demonstrate sound absorption |
For an echoing open-plan living room, consider absorptive treatment alongside furniture and curtains. For noise crossing a bedroom wall, review the partition, doors and other transmission paths first. A feature wall is not the starting point for every noise problem.
Common mistakes self-build homeowners make
Treating panelling as the soundproofing specification
A slatted feature wall does not replace a designed separating wall or floor. Keep room absorption and sound isolation as separate items in the build brief, with evidence appropriate to each.
Ordering from structural dimensions
Floor finishes, ceiling build-ups and skirting change the visible panel area. Use finished dimensions and a cutting layout before confirming quantities, particularly where a floor-to-ceiling design leaves little room for adjustment.
Leaving services until the installer arrives
A socket behind a slat or a TV bracket without backing creates avoidable rework. Agree the panel face, electrical positions and independent load-bearing supports before the wall is closed up.
Buying a finish without checking the installation evidence
A veneer sample answers a colour question, not an acoustic or fire question. Request the relevant documentation and check that it applies to the specified product and proposed assembly.
Treating every wall location as equivalent
A dry bedroom wall, a splash-prone kitchen area and a stair enclosure have different requirements. Confirm suitability for each location rather than extending one room’s specification across the whole house.
FAQ
Are acoustic wood panels worth fitting in a self-build home?
Acoustic wood panels are useful when your self-build needs room-reflection treatment and a wood-finished wall. Specify them around the room’s use and documented mounting requirements, rather than expecting them to solve every noise problem.
Will acoustic wood panels stop noise passing into my bedroom?
Acoustic wood panels are not a substitute for sound-isolating bedroom construction. Review the separating wall, doors, floor and other transmission paths before choosing decorative room treatment.
Should I choose 240 cm or 300 cm panels?
Choose between 240 cm and 300 cm panels using the finished wall height and cutting layout. Check the handling route, stopping edges and proposed joints before deciding which format fits your project.
Can I fit acoustic panels directly to plasterboard?
Use direct fixing only when the panel instructions and substrate support that method. Confirm suitable fixings and check whether the documented acoustic performance relies on a different mounting assembly.
Are Akustiq UK panels suitable for a home office?
Akustiq UK acoustic wood panels are an option for a home office where you want wood-faced acoustic wall treatment. Check the proposed coverage and mounting evidence, and address privacy through the room’s separating construction.
Can I install acoustic wood panels in an open-plan kitchen?
Specify acoustic wood panels in a kitchen only after confirming suitability for their exact position. A dry feature wall is different from a location exposed to splashes, cooking heat or grease.
How many acoustic panels do I need for my self-build?
Calculate purchasing quantities from the planned coverage, confirmed panel dimensions and cutting layout. Acoustic coverage is a separate design decision that depends on the room and the treatment’s documented performance.
When should I install acoustic panels during a 2026 self-build?
Install acoustic panels when the substrate and room conditions meet the manufacturer’s requirements and service positions are agreed. Put preparation, acclimatisation and finishing requirements into your 2026 construction programme.
One last thing
Photograph the wall before the lining closes it up. Include a clear reference showing where supports, cables and pipes sit, then retain the images with your construction drawings. That record helps future work avoid concealed services and find suitable support without treating the finished slats as structural material.
Share:
Acoustic panels for small business offices: complete 2026 guide
How to download acoustic wall panel product files from BIMobject