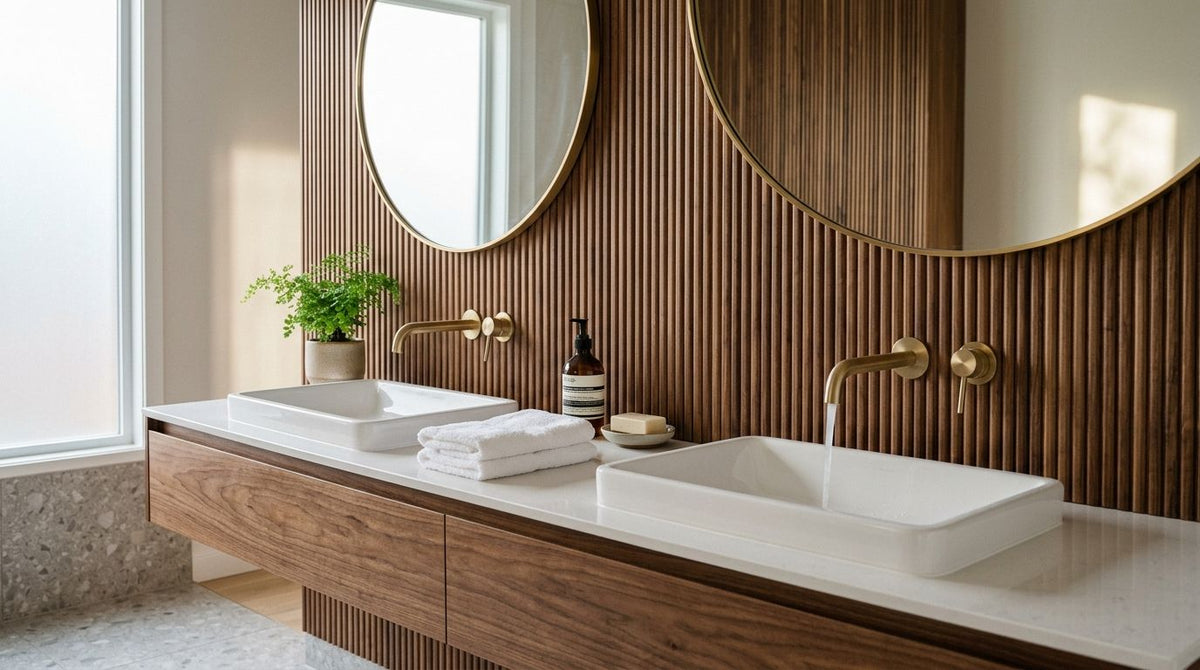
Reeded walnut bathroom panels are fluted, three-sided wood-veneer wall panels built for a vanity wall, not a living room. Akustiq UK's walnut wooden wall panel pairs that grooved profile with an acoustic felt backing, but a vanity wall asks more of any panel than an open feature wall does: steam, splashback, and tight cuts around a mirror, socket, and pipework.
- Reeded walnut bathroom panels work on a vanity wall when kept out of direct splash zones and sealed at the basin edge.
- Akustiq UK's walnut wooden wall panel ships in 240 cm and 300 cm lengths with a 3-sided real wood veneer finish.
- Order a sample before a full vanity wall order — bathroom lighting shifts how walnut grain reads compared with a showroom photo.
- Tile still wins directly inside a shower enclosure; reeded walnut wins on the dry side of the same room in 2026 renovations.
Why reeded walnut matters on a bathroom vanity wall
A vanity wall is usually the smallest wall in the room, and it's the one every visitor stares at while washing their hands. Flat tile or gloss laminate reflects bathroom lighting harshly; a reeded walnut panel breaks that reflection up into shadow lines, which is why dark wood vanity walls have replaced all-white tile schemes in a lot of 2026 bathroom renovations.
The grooves also do a practical job most buyers don't think about: they hide small water spots and toothpaste splatter far better than a flat gloss surface does. The acoustic felt backing behind Akustiq UK's wooden wall panel takes some of the hard slap-back out of a small tiled bathroom too, which matters more than people expect in a room with a mirror, a tiled floor, and no soft furnishings to absorb sound.
How to fit reeded walnut bathroom panels on a vanity wall
The steps below go in order. Skip step one and you'll find out the hard way why a panel failed at the six-month mark.
Check your bathroom's moisture zone before you order
UK wiring regulations (BS 7671) split a bathroom into zones based on distance from water: Zone 0 is inside the bath or basin itself, Zone 1 is directly above it, and Zone 2 extends roughly 60 cm beyond that. A reeded walnut panel is a decorative wood veneer, not a wet-room lining, and it belongs in Zone 2 or beyond.
- Measure the distance from the basin tap to the panel's nearest edge
- Keep the panel face at least 60 cm clear of a shower spray path if the vanity shares the room with one
- Check the extractor fan actually clears steam — condensation on the wall behind a panel causes more damage than splashing does
- Note where a heated towel rail or radiator sits, since heat cycling dries and shrinks wood veneer over time
Choose your walnut finish and panel length
Akustiq UK's reeded walnut wall panel comes in 240 cm and 300 cm lengths with a 3-sided real wood veneer finish, so the length choice is mostly about how tall your vanity wall runs floor to ceiling.
- Pick 240 cm for a standard UK ceiling height and 300 cm if you're panelling floor-to-ceiling in a taller bathroom
- Decide whether the panel runs full height behind the mirror or stops at a dado line above the basin
- Check how walnut reads next to your existing tile or worktop tone before ordering — warm walnut clashes with cool grey stone more than most people expect
- Plan for end pieces at any exposed panel edge so the veneer core doesn't sit raw against tile


Measure cuts around the vanity, mirror, and sockets
A vanity wall is full of interruptions a plain feature wall never has, so measure twice before a blade touches the panel.
- Mark the mirror recess or bracket points before cutting, not after
- Template socket and switch cutouts on card first — a wood veneer panel doesn't forgive a freehand mistake
- Check for an isolator switch or shaver socket hidden behind an old mirror cabinet
- Leave a small expansion gap at every cut edge for the panel to move with humidity
Order a sample before you commit to a full wall
Bathroom lighting — usually a mix of a mirror light and an overhead spot — shifts how walnut grain reads compared with a product photo shot in daylight. A walnut panel sample costs a fraction of a full order and settles the finish question before the wall is committed.
- Hold the sample against the vanity wall at the time of day you'll actually see it
- Check it under the bathroom's own light fittings, not a phone torch
- Compare it against tile grout colour and worktop edge, not just the worktop face
- Confirm the felt backing thickness doesn't clash with an existing skirting or dado rail
Prep the wall behind the vanity
- Strip old tile or wallpaper back to a flat, dry substrate
- Check the wall for level — panels telegraph a lean far more visibly than tile does
- Confirm any plumbing access panel behind the basin stays reachable after panelling
- Let a freshly plastered wall dry fully before fixing anything to it
Fix panels with a humidity-rated adhesive
A standard interior adhesive isn't built for a room that swings from cold to steam-saturated in minutes. High-tack panel glue is formulated for that swing, and the fixing sequence for a humid room is worth reading in full before you start — see how to approach fitting panels in a high-humidity bathroom.
- Apply adhesive in a bead pattern, not a full-coverage layer, so trapped moisture has somewhere to go
- Press and hold per the adhesive's stated cure time rather than eyeballing it
- Avoid fixing directly over a cold external wall without a vapour check first
- Never fix straight over active damp — treat the wall first
Seal joints and maintain the panel around a sink
- Run a discreet silicone bead where the panel meets the basin splashback, not just where it meets the floor
- Wipe grooves with a damp cloth rather than soaking the surface
- Keep direct spray, not just ambient steam, off the panel face
- Check the sealant line yearly — that's the point of failure, not the wood veneer itself
Reeded walnut vs other vanity wall options in 2026
| Option | Best for | Key limitation |
|---|---|---|
| Reeded walnut wood panel (Akustiq UK) | Dry-side vanity walls, warm-tone bathroom schemes | Not a wet-room lining — needs a clear splash zone |
| Ceramic tile | Inside a shower enclosure or direct splash zone | Cold, hard surface, flat look next to a wood vanity |
| PVC wet wall panel | Full wet-room walls | Plastic finish reads cheap next to real veneer |
| Painted tongue-and-groove | Budget period-style bathrooms | Paint chips and needs repainting; no acoustic benefit |
| Laminate wall panel | Rental bathrooms, quick refresh | Surface print, not real wood grain |
“A reeded walnut panel is a decorative wood veneer, not a wet-room lining — keep it out of direct water zones and it holds up fine on a vanity wall.”
Common mistakes with reeded walnut bathroom panels
- Fitting the panel inside the splash zone without a sealant plan — the veneer edge is the weak point, not the face
- Skipping the extractor fan check — a panel behind a poorly ventilated vanity traps condensation against the felt backing
- Ordering a full wall without a sample first — bathroom lighting changes walnut tone more than most buyers expect
- Cutting mirror and socket holes freehand — a template takes ten minutes and saves a ruined panel
- Using a generic adhesive instead of a humidity-rated one — the wrong glue is the most common reason a vanity panel lifts within a year
FAQ
What is a reeded walnut bathroom panel?
It's a fluted, three-sided wood-veneer wall panel with a grooved surface texture, used on dry-side bathroom walls such as a vanity wall. Akustiq UK's version adds an acoustic felt backing behind the walnut veneer.
Is a reeded walnut wall panel waterproof for bathrooms?
No — it's a wood veneer panel, not a wet-room lining, so it belongs outside direct splash zones like Zone 2 and beyond under UK wiring regulation zoning. Tile or PVC wet wall still wins directly inside a shower enclosure.
Can you fit a wood panel behind a bathroom sink?
Yes, as long as the panel sits clear of direct splash and the basin edge is sealed with silicone. Keep the panel away from Zone 0 and Zone 1, the areas closest to running water.
How much of a bathroom wall should be panelled?
Most vanity wall installs run either full height floor-to-ceiling or stop at a dado line above the basin. Full height needs a 300 cm panel length; a dado-height install works with a 240 cm panel.
What's the difference between reeded walnut and hexagon walnut acoustic panels?
The reeded panel is a flat wood-veneer sheet with vertical grooves, fixed edge-to-edge along a wall. A hexagon acoustic panel is a geometric tile format, better suited to a feature-wall pattern than a continuous vanity run.
Do reeded walnut panels need sealing in a bathroom?
The panel face doesn't need sealing, but the joint where it meets the basin splashback should get a silicone bead. That joint, not the veneer itself, is the usual point of failure.
What sizes do reeded walnut wall panels come in?
Akustiq UK's walnut wooden wall panel comes in 240 cm and 300 cm lengths with a 3-sided real wood veneer finish. Choose based on your ceiling height and whether the panel runs full height or to a dado line.
Can you cut wood panels around bathroom pipework?
Yes, with a template marked before cutting rather than a freehand cut. Leave a small expansion gap around any pipe cutout so the panel can move slightly with humidity changes.
One last thing
The joint where the panel meets the basin splashback fails long before the walnut veneer does. Check that silicone line once a year, not the wood — that's the actual maintenance job on a reeded walnut vanity wall in 2026.