Bathroom humidity ruins wood panels fast if you fit them like you would in a living room — swollen veneer, lifted edges, and mould at the joints within a few months. Get the prep, the glue, and the ventilation right and a wood panel wall survives daily showers for years.
- Keep bathroom relative humidity under 70% and you can fix wood wall panels in bathroom humidity without swelling issues.
- Acclimatise panels for 24-48 hours in the room before fitting — skipping this causes gaps by month three.
- High-tack panel glue plus a 10mm skirting gap outperforms nails in wet rooms in 2026.
- Grey Oak and Smoked Oak finishes from Akuwood Panel hold up better than pale veneers near showers.
- Extractor fans running 15 minutes post-shower cut panel failure rates more than any adhesive choice does.
Why this matters
Wood moves. Real wood veneer, even the 3-sided veneer finish used on Akuwood Panel bathroom panels, absorbs moisture from steam and releases it as the room dries. That cycle is normal in a living room where humidity barely shifts. In a bathroom, relative humidity can spike from 40% to 90% in the ten minutes a hot shower runs, then crash back down once the extractor kicks in.
That swing is what causes the two most common failures: veneer that bubbles at the seams, and adhesive that lets go at the bottom third of the panel where condensation pools. Neither is a manufacturing fault. Both are fixable with the right prep, and both are preventable if you follow the sequence below rather than treating a bathroom install like a bedroom feature wall.
2026 building guidance for UK wet rooms still points to the same baseline: keep sustained humidity under 70% RH and give panels a vapour-permeable route to dry out. Wood wall panels can absolutely go in a bathroom — they just need a different install method than a hallway or office.
What you'll need
- Hygrometer (a £10 digital one is fine) to check current humidity before you start
- High-tack panel glue rated for damp environments — Akuwood Panel's 290ml adhesive is formulated for this
- Moisture-resistant wood wall panels — darker, denser veneers like Grey Oak tolerate humidity swings better than pale finishes
- Spirit level, tape measure, fine-tooth saw or jigsaw
- Silicone sealant for edges and pipe cut-outs
- Spacers or scrap timber for the skirting gap
- Extractor fan already installed and working — not optional in a wet room
- 2-3 hours per wall, plus a 24-48 hour acclimatisation window before fitting starts
The steps
1. Measure and log the room's humidity
Run your bathroom normally for a week and check the hygrometer reading after a typical shower. If it holds above 70% RH for more than 20 minutes after you switch the extractor on, fix the ventilation before you touch a panel. No adhesive or finish compensates for a fan that's undersized or blocked with lint. Expected outcome: humidity drops back to ambient (usually 45-55%) within 15-20 minutes of extraction. Common mistake: people check humidity mid-shower instead of post-shower, which gives a false reading of how well the room actually recovers.
2. Choose panels rated for the exposure
Not every finish handles steam equally. Darker, tighter-grain veneers such as Smoked Oak or Grey Oak resist visible swelling better than lighter oak tones because the veneer layer is thinner relative to grain density. Skip anything marketed purely as a decorative interior finish for zones within 1 metre of a shower or bath — reserve those for the drier half of the room, like above a vanity. Common mistake: buying on colour alone and ignoring where the panel will actually sit relative to the water source.
3. Let panels acclimatise in the room
Unbox panels and stand them in the bathroom, unfixed, for 24-48 hours before installation. This lets the wood equalise to the room's actual moisture level rather than the warehouse it shipped from. Skipping this step is the single biggest cause of gaps appearing between panels three to six months after fitting, once the wood has finally settled to its true size. Expected outcome: panels feel the same temperature and slight dampness as the room air, not noticeably drier or cooler.
4. Prep and dry the wall surface
The substrate must be fully dry, clean, and free of old sealant or flaking paint. If the wall was recently plastered or tiled, wait until it's cured — check drying guidance for the specific product used, since times vary. For plasterboard walls specifically, follow batten spacing that suits stud centres; a full walkthrough sits in Akuwood Panel's plasterboard fitting guide if you haven't fixed panels to studwork before. Common mistake: fitting over a wall that still smells of fresh paint or plaster — that's residual moisture working against your adhesive.
5. Apply high-tack panel glue in a full-coverage pattern
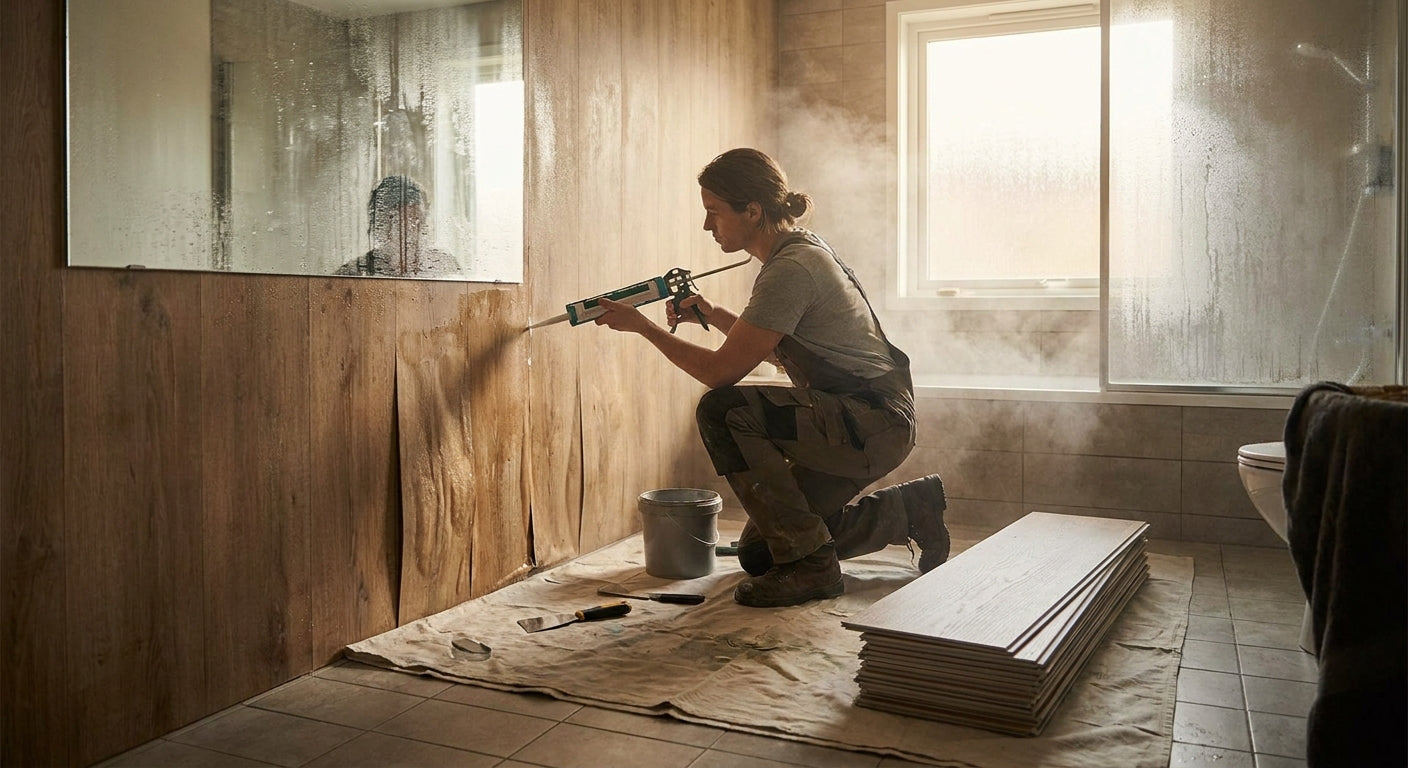
Run adhesive in vertical beads roughly 50mm apart rather than dots in the corners. In a bathroom, gap-free contact matters more than in a dry room because trapped air pockets behind the panel become condensation traps. Press each panel firmly for 30-60 seconds and support with masking tape or battens while it cures — most high-tack formulas reach handling strength within a few hours but full cure can take 24 hours. Expected outcome: zero visible gap between panel back and wall when you press an edge.
6. Leave a 10mm gap at floor and skirting level
Wood expands most at the base, where condensation and cleaning water collect. A 10mm gap covered later with quarter-round beading or sealant gives the panel room to move without buckling. Fixing panels flush to the floor with no allowance is the second most common failure mode after skipping acclimatisation. Common mistake: caulking that gap solid with silicone before the panel has settled for a few weeks — it needs to breathe initially.
7. Seal every cut edge and pipe penetration
Any place you've cut a panel to fit around a pipe, extractor housing, or light switch exposes raw wood fibre that wicks moisture faster than the finished face. Run a thin bead of clear silicone along every cut edge before fixing, and again around any penetration once installed. Expected outcome: no raw wood visible anywhere; every exposed edge has a sealed line. Skipping this is why panels fail first around towel rail brackets and extractor grilles, not in the open middle of the wall.
8. Ventilate hard for the first week
Run the extractor for a full 20 minutes after every shower for the first seven days while the adhesive cures fully and the wood settles into the room's humidity cycle. Avoid hanging wet towels directly against the new panel during this window. Expected outcome: no visible change in panel colour or seam width after the first week of normal use.
Troubleshooting
- Veneer bubbling at a seam within weeks — usually skipped acclimatisation or glue applied too thin in that spot. Re-glue the affected section after the panel has dried out fully; don't paper over it.
- Dark spots or mould at the base — the skirting gap has trapped standing water. Clear the gap, dry it with a fan for 24 hours, and check the extractor is actually pulling air, not just running.
- Panel edges lifting after 3-6 months — near-certain sign of no acclimatisation period before fitting. Prevention beats cure here; a lifted edge usually needs a full re-fix.
- Adhesive won't grip a section of wall — the wall was damp or dusty at application. Clean, fully dry, then re-apply; painted-over damp patches are the usual culprit.
- Colour looks patchy after a year — uneven humidity exposure across the wall, common near a shower screen edge. Not a fault; darker finishes like Smoked Oak show this less than pale oak.
- Gaps opening between panels — wood shrinking back after over-acclimatising in an unusually humid week. Small gaps under 2mm are normal seasonal movement, not a defect.
Tools and resources
- High-tack panel glue, 290ml — the adhesive built for this exact job
- Grey Oak wooden wall panel — a finish that copes well with steam cycles
- Digital hygrometer, spirit level, fine-tooth saw, silicone sealant, quarter-round beading
- Fixing wood wall panels to a plasterboard wall for the batten and stud-spacing basics if this is your first panel install
What to do next
Once the wall behind the shower or bath is sorted, extend the same panel finish to the rest of the room for a consistent look — see how it's done in wooden wall panels for bathroom feature walls. Get the ventilation and acclimatisation steps right there too, because a feature wall away from the shower still sits inside the same humid air.
FAQ
Can you fix wood wall panels in bathroom humidity at all?
Yes, if you keep sustained humidity under 70% RH and use a high-tack adhesive with a 10mm skirting gap. Panels fitted without acclimatisation or ventilation planning are the ones that fail within months, not the wood itself.
What's the best wood finish for a humid bathroom?
Darker, denser veneers such as Smoked Oak or Grey Oak handle steam cycles better than pale oak tones in 2026 testing conditions reported by fitters. Density matters more than colour for moisture resistance.
How much does it cost to panel a bathroom wall?
Cost depends on wall size and panel choice, so check current pricing per panel on the product page before ordering. Budget separately for high-tack glue and sealant, which are needed regardless of finish chosen.
Do wood wall panels need sealing in a bathroom?
Cut edges and pipe penetrations need a silicone seal; the factory-finished face of the panel does not need additional sealant. Skipping edge sealing is the most common cause of early moisture damage.
How long should panels sit before fitting in a bathroom?
Acclimatise panels in the room, unfixed, for 24 to 48 hours before installation. This lets the wood equalise to the room's real humidity level instead of the warehouse it shipped from.
Is nailing or gluing better for bathroom wall panels?
High-tack panel glue outperforms nails in wet rooms because it gives full-surface contact with no puncture points for moisture to enter. Nails create small gaps at each fixing point that trap condensation over time.
Why is my wood panel bubbling near the shower?
Bubbling near a seam almost always traces back to skipped acclimatisation or thin adhesive coverage at that spot. Re-gluing the dried-out section after it fully dries usually resolves it without replacing the whole panel.
Should I run the extractor fan after fitting new panels?
Run it for a full 20 minutes after every shower for the first week while adhesive cures and the wood settles into the room's humidity cycle. This single habit prevents more failures than any adhesive upgrade.
One last thing
The failure point nobody checks first is the extractor fan's actual airflow, not the panel or the glue. A fan rated for the room size but clogged with two years of dust can leave humidity above 70% RH for 40 minutes after a shower — long enough to undo a perfect install. Clean or replace the extractor before you spend a penny on panels; it's the cheapest fix in this entire guide and it protects every other step you take.