

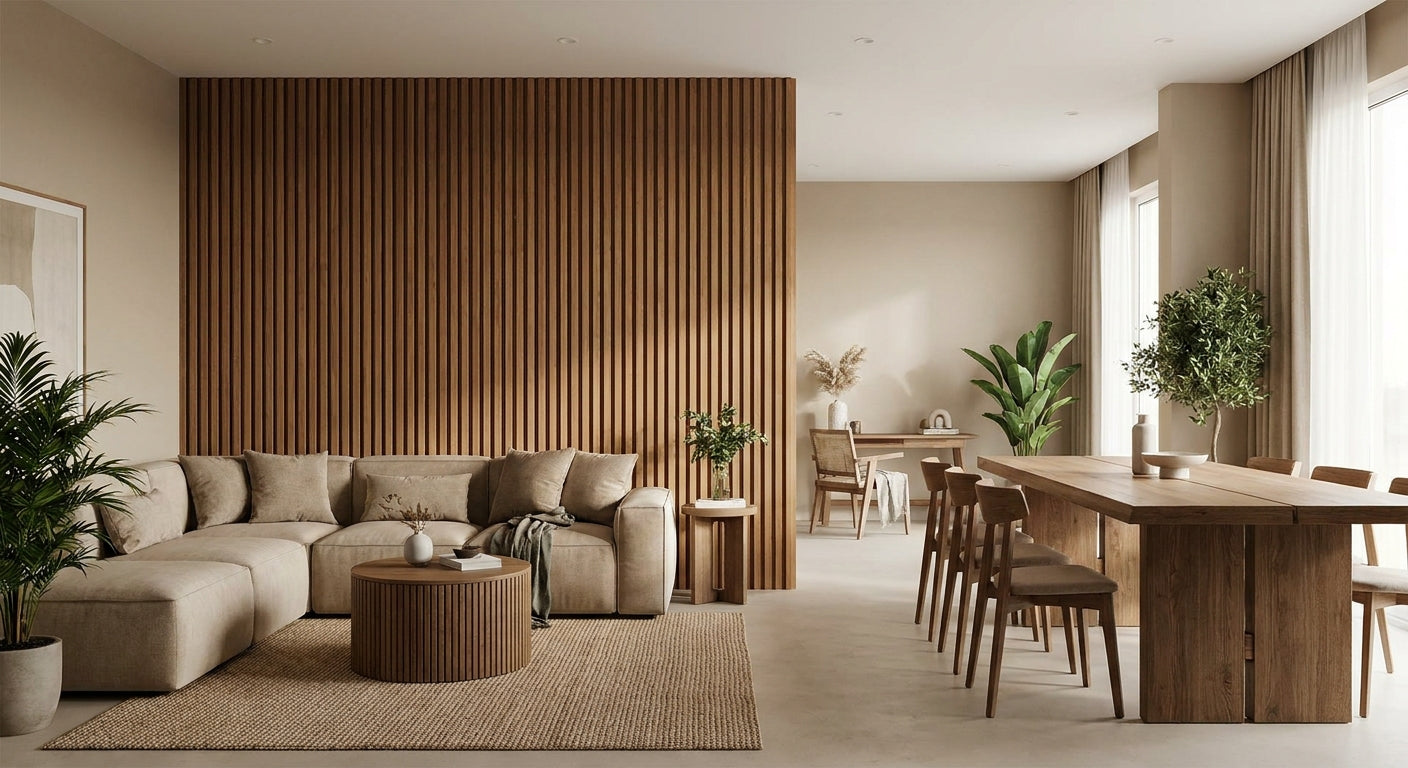
Open-plan rooms solve one problem (light, flow, resale value) and create another: nothing in the room tells your eye or your ears where one activity ends and the next begins. Wood wall panels give you a physical break between zones without boxing in the room, and the same panel that visually splits a living area from a home office also cuts the echo that open-plan rooms are famous for.
- Wood wall panels to zone an open plan room work as partial-height dividers, not full walls to keep light moving: Buy.
- A 240cm panel run marks a boundary at seated eye level; go 300cm only if you want a full floor-to-ceiling split.
- Black Oak reads as a hard boundary fastest; Natural Oak keeps zones feeling connected in 2026 open-plan renovations.
- Skip full-height partitions in rooms under 30 square metres — they kill the open-plan point entirely.
Why this matters
An open-plan kitchen-diner-living room with bare plaster or plasterboard walls behaves like an echo chamber: sound bounces wall to wall with nothing to break it up, which is why conversations get lost over a running dishwasher or a TV in the next zone. Acoustic wall panels for large open-plan spaces solve the sound problem and the layout problem in one move, because a run of panels absorbs mid-range frequencies through its felt backing while also giving the eye a stopping point.
Most UK open-plan conversions in 2026 are knock-through Victorian or 1930s semis, or new-build kitchen-diners with one long wall and no internal doors. In both cases the fix isn't a stud wall — it's a panel divider that reads as furniture, not construction.
What you'll need
- Tape measure and a spirit level (a 1.2m level is long enough for most runs)
- Panel adhesive rated for interior wood veneer, applied in beads not dots
- A stud finder if you're fixing into plasterboard rather than a solid partition
- Panels in your chosen finish — enough for the full run plus 10% for cuts
- A fine-tooth saw or oscillating multitool for trimming to length
- Two to three hours per 3-metre run, plus overnight cure time before hanging anything on the panel
The steps
1. Map the zones before you touch a panel
Walk the room and mark, with masking tape on the floor, where the sofa zone ends and the dining or work zone starts. This sounds basic but it's the step people skip, and skipping it is why half-finished panel walls end up in the wrong spot. Give yourself a straight sightline of at least 1.5 metres either side of the proposed panel run so both zones still feel like rooms, not corridors.
2. Choose partial-height over full-height
A panel run stopping at 1.8m to 2.1m high signals a boundary without blocking light or sound from travelling where you want it to. Full floor-to-ceiling runs work in rooms over 30 square metres, but in a standard UK open-plan space they usually just recreate the wall you removed. Standard panels come in 240cm and 300cm lengths — use 240cm stood on its side for a partial-height divider, and reserve 300cm for genuine floor-to-ceiling splits.
3. Pick a finish that reads as a boundary, not decoration
Dark finishes create the strongest visual break. Wooden Wall Panel Black Oak is the fast route to a defined zone because the contrast against a lighter kitchen or living wall registers instantly, even from across the room. Lighter finishes like Natural Oak or Mocca soften the divide and suit rooms where you want zones to feel connected rather than separated — Buy Black Oak for a hard split, consider Natural Oak if the room already has warm tones you don't want to fight.
4. Calculate panel count before you order
Measure the run in metres, divide by 0.6m (standard panel width), and add one extra panel for waste and cuts. A 3-metre partial-height run at 2m tall needs roughly 5 panels — get this number wrong and you'll be waiting on a second delivery mid-project.
5. Fix the first panel dead plumb
Everything after panel one follows its line, so get the level right before the adhesive sets. Apply panel glue in a zigzag bead across the back, press for 30 seconds, then brace it until cure — a panel that's 2 degrees off at the base is visibly crooked by the time you're four panels along.
6. Use the 3-sided veneer edge to your advantage
Because the panel is a genuine real wood veneer on three sides, a divider standing proud in a room (rather than flush to a wall) shows a finished face from both zones. This is what makes wood wall panels to zone an open plan room different from stud-wall partitions clad on one side only — you get a finished look from the sofa and from the dining table.
7. Finish the exposed edge with an end piece
A divider that stands away from a wall has an exposed side edge, and a raw cut edge undoes the whole effect. Matching end pieces close that edge cleanly so the panel looks manufactured rather than sawn on site.


Troubleshooting
- Panel wobbles at the top when pushed — the base fixing hasn't cured or wasn't braced long enough; re-glue and clamp for a full 24 hours before loading it.
- Visible seam between panels — panels weren't pushed tight edge-to-edge during cure; on the next run, use a spacer block and press seams closed before the adhesive skins over.
- Echo persists even with the divider up — a single panel run absorbs some sound but won't fix a room with hard floors and no soft furnishing; pair the divider with a second panel section on an adjacent wall.
- Divider looks flimsy from the back — you skipped the end-piece trim on the exposed edge; retrofit one rather than leaving raw veneer showing.
- Panels won't sit flush on an uneven wall — pack behind low spots with thin ply shims before fixing, don't rely on the adhesive to fill a gap over 3mm.
- Room feels chopped up, not zoned — the panel run is too tall or too long for the room; drop to partial-height or shorten the run by one panel width.
Tools and resources
- Panel glue rated for interior veneer (apply in continuous beads, not dots, for full contact)
- A 1.2m spirit level for checking plumb across multiple panels
- Natural Oak and Black Oak finishes for warm-connected versus hard-boundary zoning
- Matching end pieces for any divider that stands proud of a wall
What to do next
If the room still feels loud after the divider goes up, the next fix isn't more panels in the same spot — it's addressing the specific work-versus-living noise conflict. Reducing noise bleed between open-plan work zones covers where a second, smaller panel section does more good than extending the first one.
FAQ
What's the best way to use wood wall panels to zone an open plan room?
A partial-height panel run, 1.8m to 2.1m tall, marks a boundary without blocking light between zones. Full floor-to-ceiling runs only make sense in rooms over 30 square metres.
Is a wood panel divider better than a stud wall for zoning?
For open-plan rooms, yes — a stud wall blocks light and airflow permanently, while a standing panel divider marks a zone and can be moved later. It also finishes on both faces since the veneer is 3-sided.
How many wall panels do I need to zone a room?
Divide your planned run length in metres by 0.6m (standard panel width), then add one extra panel for cuts and waste. A 3-metre run at 2m tall typically needs around 5 panels.
Do wood wall panels actually reduce echo in open-plan spaces?
Yes — the felt backing behind the veneer absorbs mid-range frequencies that bounce between bare walls. A single divider run reduces some echo but pairing it with a second wall section works better in larger rooms.
Should I choose 240cm or 300cm panels for a room divider?
Use 240cm panels turned sideways for a partial-height divider around 2m tall. Reserve 300cm panels for full floor-to-ceiling splits in taller rooms.
What finish works best for a zoning divider in 2026 open-plan homes?
Black Oak creates the fastest visual boundary because of its contrast against lighter walls. Natural Oak or Mocca work better when you want zones to feel connected rather than sharply divided.
Can I fix a panel divider without damaging plasterboard walls?
Use a stud finder to locate solid fixing points and panel adhesive rated for the wall type rather than relying on plasterboard fixings alone for a standing divider. A divider that stands proud of the wall needs its own braced base rather than wall fixings at all.
How long does it take to install a panel divider in an open-plan room?
Budget two to three hours per 3-metre run, plus overnight cure time before the divider takes any load. Cutting end pieces to finish exposed edges adds roughly 30 minutes per run.
One last thing
The detail people miss: a divider that stops 15cm short of the ceiling reads as intentional zoning, while one that runs edge-to-edge floor-to-ceiling reads as a wall that's missing its door. If you're unsure which height to commit to, tape up a cardboard mock-up at 2m first — it costs nothing and saves you cutting a 300cm panel down after the fact.
Share:
Wooden Slat Panels for Ceiling Alcoves: 2026 Buying Guide
Wooden Slat Panels for Ceiling Alcoves: 2026 Buying Guide