

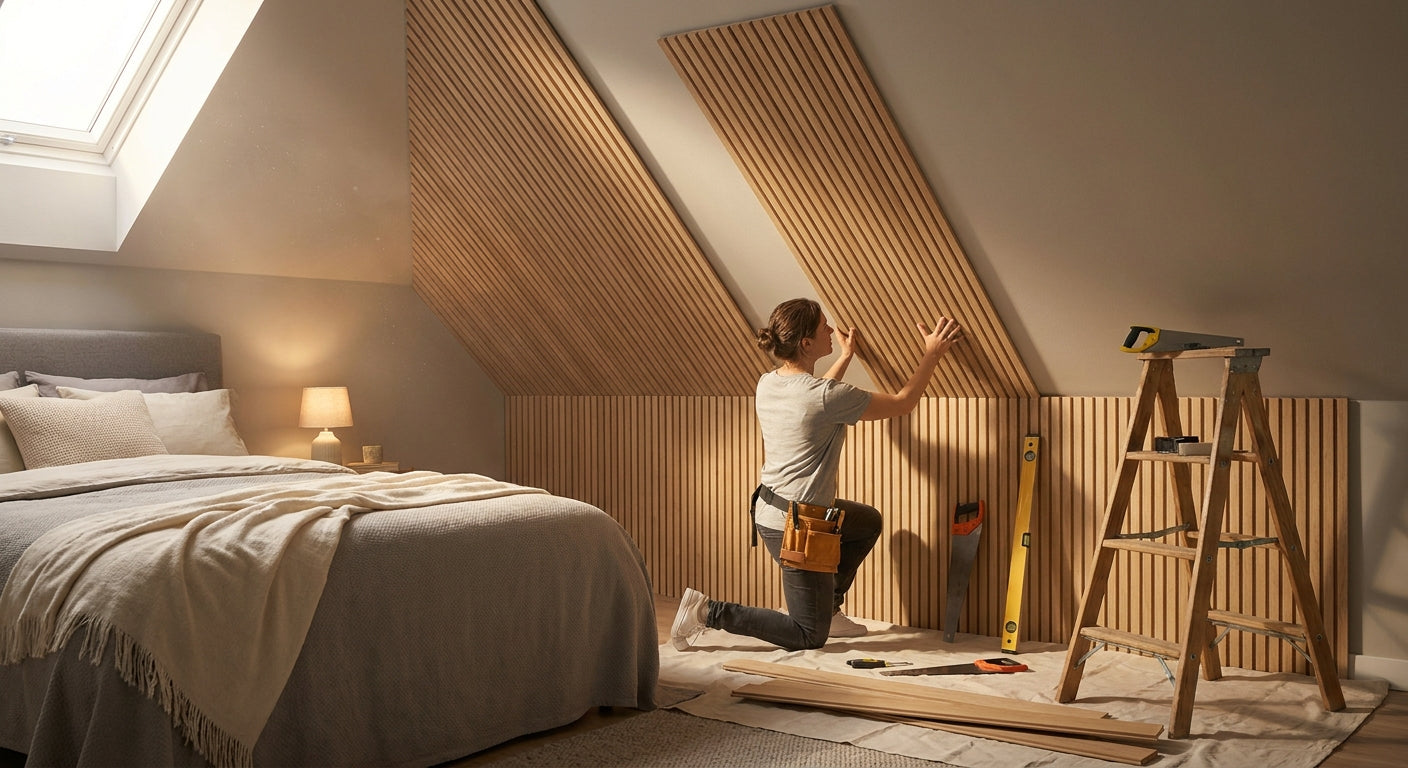
Wood panels on a sloped attic wall only sit flush when the batten line matches the roof pitch first — get that wrong and every panel above it drifts out of true.
- Wood panels on a sloped attic wall need battens cut to the roof pitch, not a flat grid — most DIY fits skip this step.
- 240cm and 300cm panel formats both work on a pitch; measure the slope length before you order in 2026, not the vertical wall height.
- High-tack panel glue alone won't hold a mitred edge on a slope — pair it with mechanical fixings into the batten.
- Leave a 10mm gap behind the panel run in an unheated loft or trapped moisture blisters the veneer within a season.
Why this matters
A sloped attic wall isn't a vertical wall with a funny angle — it's a rafter line running at 30 to 45 degrees on most UK roofs, and standard wood slat panels, including Akustiq UK's, are milled square, not raked for a pitch. Fit them the way you'd fit a bedroom feature wall and the top edge gaps at the ridge, the bottom edge overhangs the eave, and the acoustic felt backing never sits flat against the batten.
Loft conversions in 2026 are still one of the busiest jobs for attic paneling, because the room is usually already insulated and plastered — the wall just needs covering. Get the pitch cut right once at the start of the run and every panel after it follows the same line without extra measuring.
What you'll need
Akustiq UK panels come in 240cm and 300cm lengths, so measure the slope length from eave to ridge before you choose a size — a shorter run on a low knee wall wastes less board in the 240cm format.
- Wood slat panels sized for the slope, not the room height — Natural Oak wall panel covers both size formats
- A digital angle finder or a protractor and a 1200mm spirit level
- Timber battens, 18-25mm, enough to run every 40-50cm up the slope
- A mitre saw or fine-tooth hand saw for angled end cuts
- High-tack panel glue plus mechanical fixings for the batten line
- Tape measure, pencil, and packers or shims for uneven rafters
- Dust mask and gloves — real wood veneer sands, it doesn't just wipe clean
The steps
1. Map the roof pitch and rafter centres
Find every rafter behind the plasterboard with a stud detector and mark centres in pencil — most UK lofts run rafters at 400mm or 600mm centres. Measure the roof pitch angle with the angle finder at three points along the wall, because older roofs rarely hold one true angle end to end.
This reading is what sets your batten cut angle before a single panel goes up. Skip it and you'll be correcting drift with shims for the whole run instead of fixing it once at the source.
2. Batten the wall to create a true flat plane
Fix battens horizontally across the rafters, packing out any low spots with shims until a spirit level reads flat along the full length of the wall. On a masonry knee wall, batten straight into the wall; on stud and plasterboard, screw through into the studs behind, not just the board face.
The batten line is what the panel actually grips, not the rafter or the pitch itself. Get this flat and level and the roof angle stops being a problem the moment you start fixing panels.
3. Cut the first panel to the pitch angle
Set the mitre saw to the angle measured in step one and cut the top edge of the first panel before touching anything else. A detailed cutting guide covers blade speed and veneer tear-out, both of which matter more on an angled cut than a square one.
Dry-fit that single panel against the ridge line before cutting a second one. One wasted 300cm panel here costs less than six wasted ones later in the run.
4. Dry-fit the full run before gluing
Lay every panel for the wall in position without any adhesive and check the click joints line up across the whole slope. On a pitched wall small errors compound fast — a 2mm gap on panel one can open to 8mm by panel four.
Catch that drift now, while it costs nothing to correct. Once the glue's gone off, correcting a misaligned run means pulling panels off the batten.
5. Fix from the low eave up to the ridge
Work in one direction, low to high, so gravity and the click-lock system work with you instead of against you. Apply glue in a bead along the batten line, press the panel home, and hold for the cure window stated on the tube — most high-tack panel adhesives need 60 to 90 seconds of pressure before they grip enough to let go.
Check plumb every third panel rather than waiting until the end. Drift on a slope compounds faster than on a flat wall, so small corrections early save a bigger fix at the ridge.
6. Cut around Velux windows, beams and services
Template around any roof window or exposed beam with cheap card before cutting the real panel — a paper template costs nothing, a ruined 300cm panel doesn't. Leave a few millimetres of clearance around window frames for seasonal timber movement.
Mark cable and pipe positions on the batten before you fit the panel in front of them. Cutting an access hole after the panel's glued in is far messier than planning for it now.
7. Finish the ridge and skirting edges
Use end pieces or a scribed cut at the ridge line so the raw batten edge never shows, and close the low edge with a skirting or scribed board. This is where Akustiq UK's 3-sided veneer finish earns its keep — the exposed edge at a mitred ridge cut still shows real wood grain, not a chipboard core.
A laminate panel shows its base material the moment you angle-cut it. A veneered panel doesn't, which matters more on a sloped wall than a flat one because every cut edge along the pitch stays visible.
8. Let the adhesive cure before loading the wall
Leave the finished run for at least 24 hours before hanging anything on it or leaning furniture against the low eave edge. Cure times vary by adhesive brand and room temperature, so check the tube instead of guessing on a cold loft in winter.
An unheated loft in January cures slower than a heated one in summer. Give it the extra time rather than testing the bond early.
“If the panel doesn't sit flush at the ridge, the batten line is wrong, not the panel.”
Troubleshooting
Panel doesn't sit flush at the ridge. The batten line is out of true, not the panel itself — recheck with a spirit level before assuming the cut angle is wrong.
Panel bows partway up a long slope. Unsupported spans over 60cm between battens let the panel flex under its own weight; add an intermediate batten rather than more glue.
Glue won't grip the mitred edge. Angled veneer cuts absorb more adhesive than a flat face does, so apply a thicker bead and hold pressure for the full cure window rather than the usual few seconds.
Condensation appears behind the panel months later. An unheated loft with no airflow traps moisture against the felt backing; a 10mm gap behind the batten line prevents it from building up.
Colour or grain mismatches between panels from different batches. Real wood veneer varies by tree and batch, so order every panel for one wall in a single purchase rather than topping up later.
Tools and resources
- Timber battens (18-25mm) and packers for uneven rafters
- Digital angle finder or protractor plus a 1200mm spirit level
- Mitre saw with a fine-tooth blade rated for veneered board
- High-tack panel glue and mechanical fixings for the batten line
- Stud detector to locate rafters and studs before drilling
- A moisture meter if the loft has any history of condensation
What to do next
Once the wall's covered, the panel finish matters as much as the fit. A loft with limited natural light reads differently in Smoked Oak than it does in Natural Oak, and the finish you pick changes how the boxed-in roof line feels once the job's done. As loft conversions keep running through 2026, the guides below cover panel counts and full loft feature walls in more detail than fits here.
FAQ
What's the best way to fit wood panels on a sloped attic wall?
Batten the wall to a true flat plane first, cutting the batten and the first panel to the roof pitch angle before fixing anything else. Skipping the batten step is why most sloped-wall installs gap at the ridge.
Can I fix wood slat panels directly onto rafters without battening?
No — rafters aren't a flat plane, so panels fixed straight onto them twist along the run. Battens packed level give the click-lock system something flat to grip.
What angle do I cut wood panels for a roof pitch?
Cut to the actual pitch you measure on site, typically 30 to 45 degrees on UK roofs, not a standard angle from a chart. Roof pitches vary by a few degrees along the same wall, so measure at three points.
How many wood panels do I need for a sloped attic wall?
Measure the slope length from eave to ridge, not the vertical wall height, since the panel run follows the angle. Panels come in 240cm and 300cm lengths, so plan cuts around whichever length wastes less material.
Do sloped attic walls need a ventilation gap behind wood panels?
Yes, in an unheated or poorly ventilated loft leave roughly 10mm behind the batten line. Skipping this traps moisture against the acoustic felt backing and can blister the veneer within a season.
Is panelling a sloped ceiling different from a sloped wall?
Yes — a ceiling run needs mechanical fixings in addition to adhesive because gravity works against the glue, while a wall at the same pitch can rely on adhesive plus the batten grip.
What does it cost to panel a sloped attic wall in 2026?
Cost tracks the wall area and the panel finish chosen, plus battens, glue and end pieces, so check current panel pricing on the site for a figure matched to your slope length.
Will real wood veneer panels cope with loft temperature swings in 2026?
A 3-sided veneer panel handles normal loft temperature swings once the room is insulated and ventilated, but an uninsulated loft with big seasonal swings still needs the ventilation gap behind the batten to stop movement.
One last thing
The edge you'll notice most on a sloped wall is the mitred cut at the ridge line, not the flat face everyone worries about. A laminate panel shows a raw core there; a 3-sided wood veneer panel like the ones Akustiq UK ships still shows real wood grain on that cut edge — the detail that makes a pitched wall look finished instead of boxed-in.
Share:
Combine Exterior Cladding With Render Facade (2026 Guide)
Acoustic Panels for Call Centres: 2026 Buying Guide