

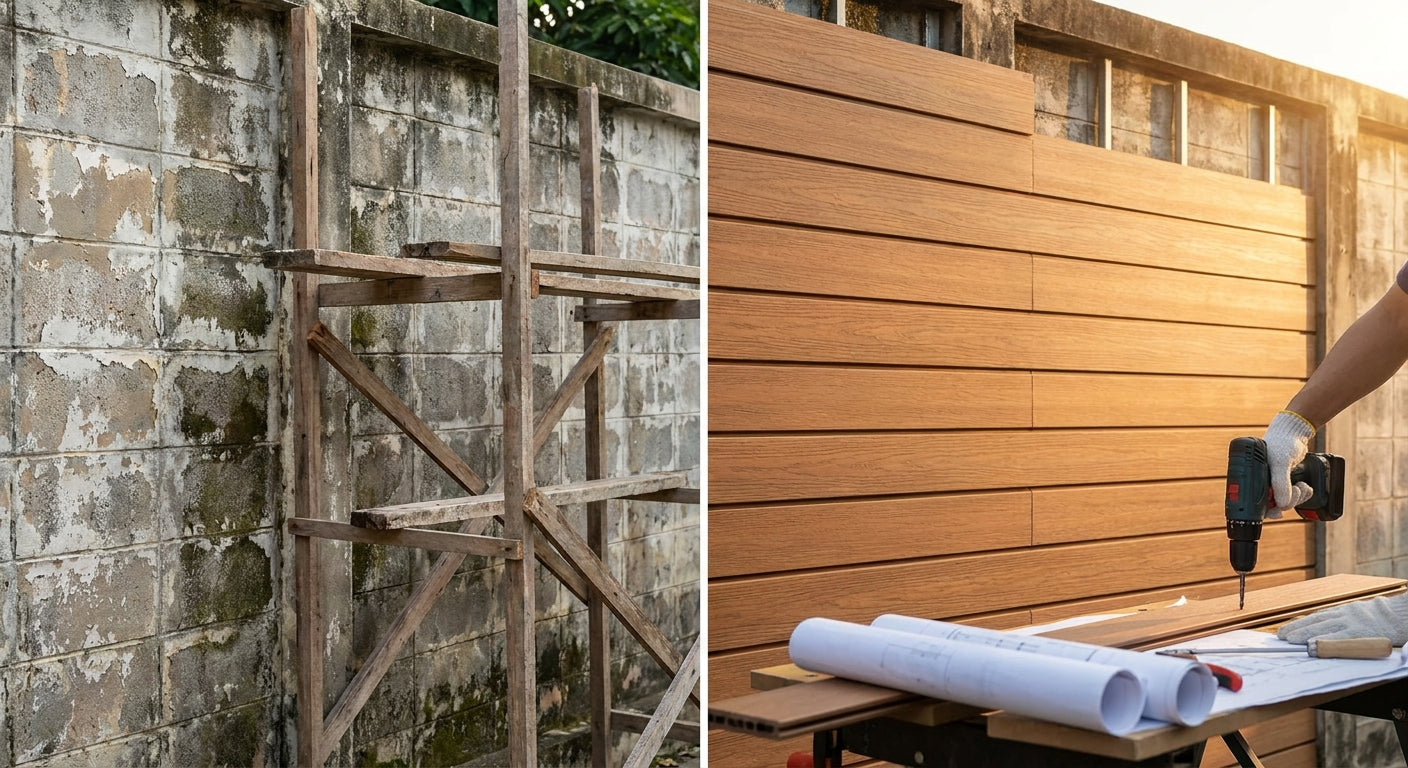
An ugly exterior wall doesn't need re-rendering, sandblasting, or a skip full of rubble - exterior wall cladding panels sit over cracked render, patchy brick, or tired pebbledash and give the facade a finished look in a weekend. This guide covers exactly how to cover ugly exterior wall with cladding, from battens to the final trim.
TL;DR
Cladding a damaged exterior wall means building a batten frame, fitting a breathable membrane, then screwing panels onto the battens from the bottom up. Most single-storey walls take one to two days once the frame is up. AKU Woodpanel's black exterior wall cladding panel and matching finishing trims are a solid pick for anyone covering render cracks or old brick in 2026 without touching the existing wall structure - verdict: Buy, provided the wall is structurally sound underneath.
Why this matters
Re-rendering a wall costs time, mess, and a drying period that can stretch into weeks depending on weather. Cladding skips all of that - it goes straight over the existing surface once battens are fixed, and it hides cracks, staining, and colour mismatches permanently rather than papering over them for a season. In 2026, with more UK homeowners tackling exterior refreshes themselves rather than booking a renderer months out, cladding has become the faster route to a wall that actually looks intentional.
What you'll need
- Timber battens (treated, 25-38mm thick) to create the fixing frame
- A breathable membrane to sit between the wall and the battens
- Exterior wall cladding panels in black, or another finish depending on the look you want
- Corrosion-resistant exterior screws
- A spirit level, a chalk line, a cordless drill/driver, and a fine-tooth saw for cutting panels to length
- Packers or shims for uneven wall sections
- A tape measure and a pencil for marking out
Budget half a day for prep (battens and membrane) and another half to full day for the cladding itself on an average single-storey wall, weather permitting.
The steps
1. Check and prep the existing wall
Before anything goes up, confirm the wall is dry, structurally sound, and free of loose render or crumbling brick. Cladding hides cosmetic damage brilliantly but it will not fix a wall that's actively failing. Knock off any loose render with a bolster, brush down dust and debris, and let the surface dry fully - a damp wall behind cladding traps moisture and causes problems later. Common mistake: cladding straight over a wall with rising damp or a leaking gutter above it, which just moves the moisture problem behind the panels where you can't see it.
2. Mark out and fix the batten frame
Use a chalk line to mark horizontal batten positions, spaced evenly up the wall - vertical battens if you're running panels horizontally, horizontal battens if running vertically. Fix battens with masonry screws long enough to bite at least 40mm into solid brick or block, and use packers behind any battens sitting over dips in the wall so the whole frame reads flat. Check with a spirit level every metre or so; a frame that's out of true will show in every panel line once cladding goes up. This step decides whether the finished wall looks sharp or wavy, so don't rush it.
3. Fit the breathable membrane
Roll the membrane over the battens before the panels go on, overlapping each strip by roughly 100mm and taping the joins. This lets any moisture that gets behind the cladding escape rather than sitting against the wall. Skip this step and you're trading one damp problem for another a few years down the line - it's cheap insurance for a job that should last well past 2026.
4. Start the first row from a level baseline
Set a level line near the base of the wall and fix your first row of panels to it, not to the ground, which is rarely perfectly level. Getting this first row dead straight matters more than any other row, because every panel above locks into the one below it. Expected outcome: a crisp horizontal line running the full width of the wall with no visible dip or rise.
5. Work up the wall row by row
Clip or screw each subsequent row of exterior wall cladding into the battens, checking level every two to three rows rather than trusting the interlock alone - small errors compound as you go up. Stagger any panel joins across rows so you don't end up with a repeating vertical seam that draws the eye. Common mistake: forcing a slightly bowed panel into place instead of swapping it out, which telegraphs as a visible ripple once the whole wall is clad.
6. Cut and fit around windows, doors, and corners
Measure twice before cutting panels to fit around openings, and leave a small expansion gap (2-3mm is typical) rather than cutting panels tight to the frame - timber-effect cladding moves slightly with temperature. Use exterior cladding finishing trim at open edges and around openings to give cut ends a clean, deliberate finish rather than an exposed edge.
7. Finish corners and top edges
Corner trims turn a butted, slightly rough corner into a proper mitred-looking finish, and a top capping piece stops water sitting on exposed top edges. This is the step that separates a DIY-looking job from one that reads as professionally finished from the street. Skipping trims to save an afternoon is the single most common shortcut that makes an otherwise solid cladding job look unfinished.
8. Inspect and seal any exposed fixings
Walk the wall once it's done and check every screw head is flush, every panel edge is tight to its neighbour, and no cut edges are left exposed without trim. A five-minute inspection now saves a return trip up a ladder in six months.
Troubleshooting
- Panels won't sit flush against the battens - the batten frame is out of true; re-check with a level and re-pack low spots before continuing rather than forcing panels to compensate.
- Visible gap or shadow line between rows - the interlock wasn't fully engaged before fixing; back the row off and reseat it properly.
- Cladding looks wavy from a distance - almost always a batten spacing or packing issue from step 2, not a fault with the panels themselves.
- Water pooling at the base of the wall - check the ground clearance under the first row; cladding should sit clear of soil and paving to avoid wicking moisture.
- Colour looks patchy in direct sun - panels from different batches can show slight tone variation; order from one batch where possible for a single continuous run.
- Screws pulling out of battens - the batten timber may be too thin or the screw too short; 25-38mm battens with screws biting at least 25mm into the batten is the safer spec.
Tools and resources
| Item | Purpose | Typical quantity |
|---|---|---|
| Treated battens | Fixing frame for panels | Full wall height/width in linear runs |
| Breathable membrane | Moisture management behind cladding | Full wall area plus overlaps |
| Exterior cladding screws | Fixing panels to battens | Per manufacturer spacing guidance |
| Corner and finishing trims | Clean edges and corners | One run per external corner/opening |
| Spirit level and chalk line | Keeping rows true | One set, reusable |
Having the right fixings and trims on site before you start avoids the classic mid-job trip to the merchant for one missing corner piece.
What to do next
Once the batten frame and membrane are sorted, the actual panel fitting moves quickly - the full exterior cladding installation guide walks through panel-specific fixing patterns and spacing in more detail than fits here.
FAQ
What's the best cladding for covering an ugly exterior wall? Exterior wall cladding panels that clip or screw onto a batten frame are the most practical option because they don't require the underlying wall to be repaired first, only sound. Colour and finish (black, oak, birch, stone grey) come down to the look you want against the rest of the house.
Can I clad over cracked render without fixing it first? Yes, as long as the render isn't crumbling or actively coming away from the wall. A batten frame with packers evens out minor imperfections, but loose or hollow-sounding render should be removed before you start.
How long does it take to clad an exterior wall? A single-storey wall typically takes one to two days once the batten frame and membrane are in place, depending on how much cutting is needed around windows and doors.
Do I need planning permission to add exterior cladding in 2026? Most domestic cladding falls under permitted development rules in England and Wales, but conservation areas, listed buildings, and some flat conversions have restrictions - check with your local planning authority before ordering materials.
Is exterior cladding better than re-rendering? Cladding is faster to fit and doesn't need a drying period, while render gives a smoother, more traditional finish. For a wall with existing cracking or patchy colour, cladding is usually the quicker fix.
What spacing do battens need for exterior cladding? Battens are typically spaced to match the panel's fixing points, checked level every metre, with packers used behind any low spots so the finished surface reads flat.
Does exterior wall cladding need maintenance? Yes, periodic checks for loose fixings and debris buildup at the base keep cladding performing over several years - see the maintenance guide below for a full schedule.
Can cladding be fitted over brick as well as render? Both surfaces work as long as they're dry and structurally sound; the batten and membrane build-up is the same regardless of what's underneath.
One last thing
The detail most DIYers skip is the finishing trim around openings - it's a small cost against the whole job, but it's the single visual cue that tells a passerby the wall was clad on purpose rather than patched. Get the trims right and the cheapest panel choice will still look considered; skip them and even a premium panel run looks unfinished.
Share:
Acoustic Wall Panels With LED Lighting: 2026 Verdict
Wooden Wall Panels for Kitchen Feature Walls: 2026 Verdict