Wet wall panels for a bathroom fall into two very different camps: waterproof PVC or acrylic systems built to sit inside a shower enclosure, and decorative wood veneer panels built for the dry and splash-adjacent walls around them. Confuse the two and you either overspend on a shower wall or underprotect a feature wall — this guide sorts out which panel goes where in 2026.
- True wet-zone panels (PVC, acrylic-faced MDF) belong inside the shower enclosure, not on a feature wall.
- AKU Woodpanel's real wood veneer panels suit the dry and splash-adjacent walls of a bathroom: Buy for a feature wall, Skip for a shower surround.
- Panels come in 240cm and 300cm formats in 2026 — measure ceiling height before ordering.
- Order a sample before buying: grain and tone shift under bathroom lighting more than in a living room.
- Budget adhesive and trims separately from the panel price.
Why this matters
Bathrooms punish the wrong material choice faster than any other room in the house. Steam, splashback and standing humidity will swell a panel that isn't rated for it within weeks, not years.
The fix isn't picking one "wet wall panel" and using it everywhere — it's splitting the room into a wet zone and a dry zone and matching the panel to each. AKU Woodpanel's guide on wooden wall panels for bathrooms covers where real wood veneer panels work well and where they don't, and that distinction drives most of the decisions below.
Get this split wrong once — panel a shower recess with a decorative veneer wall panel — and you're looking at a replacement job inside a year, in 2026 prices included.
What you'll need
- Tape measure and spirit level
- A clear map of the wet zone (inside and directly around the shower or bath) versus the dry zone (everything else)
- Panel adhesive rated for bathroom or high-humidity use
- A fine-tooth saw or jigsaw for pipework cutouts
- A sample of your shortlisted finish — order one before you commit to a full wall
- A real wood veneer panel for the feature wall build, such as the natural oak wall panel, reserved for dry or splash-adjacent walls only
The steps
1. Map the wet zone before you shop
Walk the bathroom and mark, in your head or on paper, exactly where water lands directly — inside the shower cubicle, the bath surround, behind a freestanding basin splashback. Everything outside that line is dry or splash-adjacent. This map decides which product category you need before you look at a single finish. Skipping this step is the single biggest reason bathroom panelling projects fail early.
2. Separate "wet wall panel" from "feature wall panel" mentally
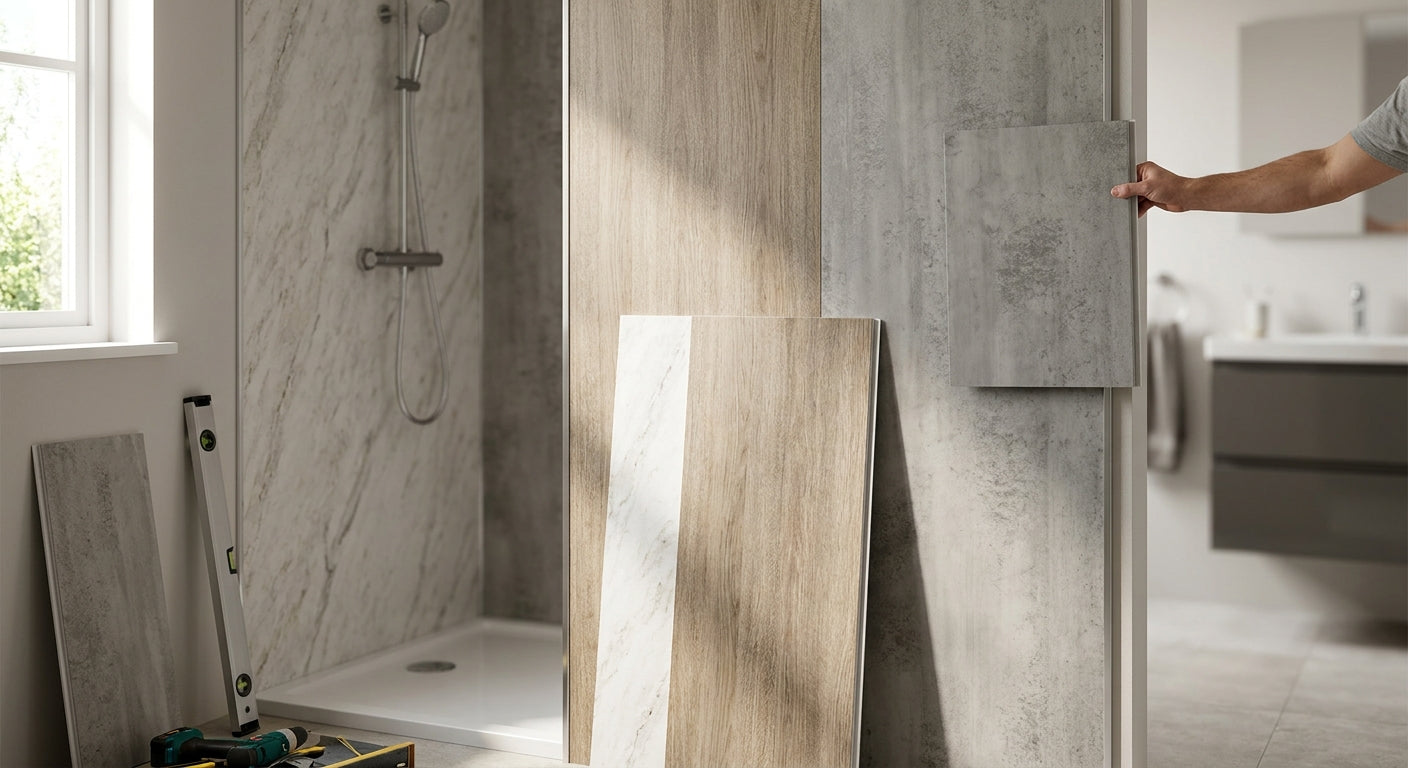
A wet wall panel in the traditional sense is a waterproof PVC, acrylic, or laminate board designed to take direct, sustained water contact inside a shower enclosure. A feature wall panel — including real wood veneer panels with a 3-sided finish — is designed for the dry and splash-adjacent zones you mapped in step one. Treat them as two separate purchases, not one product doing two jobs.
3. Check the panel core and finish
For the wet zone, confirm the core material is fully waterproof (solid PVC, waterproof-faced MDF, or acrylic) with sealed edges. For the dry zone, a real wood veneer panel with an acoustic felt backing — AKU Woodpanel's flagship format — gives you the grain and warmth that PVC panels can't match, but it belongs on walls steam reaches, not walls water hits directly.
4. Match panel size to your ceiling height
AKU Woodpanel's wood veneer panels ship in two size formats: 240cm and 300cm. A standard UK bathroom ceiling around 2.4m works cleanly with the 240cm format; anything taller needs the 300cm option to avoid an ugly infill strip at the top. Measure the actual wall height at three points, not just the door frame, since bathroom ceilings are rarely dead level.
5. Confirm the installation method
Wet zone panels typically click-fit tongue and groove over a waterproofed backer board. Dry zone wood veneer panels are usually glued directly to a flat, sound substrate. Check which method your walls support before ordering — a bowed plasterboard wall needs battening either way.
6. Order a sample before you commit
Bathroom lighting — often cooler and more direct than a living room's — shifts how a wood tone reads. A natural oak panel that looks warm under a living room's ambient light can read flatter under a bathroom's downlights. A sample panel costs a fraction of a full wall and removes the guesswork entirely.
7. Budget adhesive, trims and end pieces separately
Panel price rarely includes adhesive, corner trims or end pieces, and bathroom installs need all three. Factor a standard expansion gap — around 5mm — at every join and wall edge so the panel has room to move as humidity fluctuates through the year.
8. Plan ventilation around the panelled wall
Even a correctly zoned feature wall needs the room's extractor fan doing its job. A panel installed in a bathroom with poor ventilation will trap moisture behind it regardless of finish quality, and that's a ventilation problem, not a panel problem.
“If steam lands on it directly and stays wet, it belongs in the shower enclosure — not on a feature wall.”
Troubleshooting
- Veneer panel showing gaps at the joints months after install — usually a missing expansion gap. Re-check that a small gap, roughly 5mm, was left at every seam during fitting.
- Panel feels damp behind the surface — points to inadequate ventilation, not a faulty panel. Run the extractor fan longer after showers and check it's rated for the room size.
- Colour looks different from the sample once installed — bathroom lighting is the usual cause. Order a second sample and view it under the room's actual light fixture before final decisions.
- Adhesive failing at the base of the wall — standard interior adhesive isn't rated for sustained humidity. Switch to a bathroom-rated or high-tack adhesive built for damp environments.
- Panel installed too close to the shower head — this is a zoning error, not a fault. Move the panelled section back outside the direct spray radius or swap that specific section for a true waterproof wet wall panel.
Tools and resources
- Tape measure, spirit level, fine-tooth saw
- Bathroom-rated adhesive — High Tack Panel Glue is built for panel fitting jobs like this
- A wall panel sample ordered ahead of the full purchase
- AKU Woodpanel's guide on fitting wall panels in a high-humidity bathroom for the fixing detail this article doesn't cover
What to do next
Once the wet zone and dry zone are mapped and you've picked a finish, the next decision is layout — read AKU Woodpanel's guide on wooden wall panels for bathroom feature walls before you order the full wall quantity.
FAQ
What's the best wet wall panel for a bathroom shower?
A waterproof PVC or acrylic-faced panel with sealed edges is the right choice for direct shower contact in 2026. Real wood veneer panels are not rated for that zone and should stay on the dry or splash-adjacent walls instead.
Can you use wood panels in a bathroom at all?
Yes, but only on walls outside the direct wet zone — feature walls, walls opposite the shower, or splash-adjacent areas with good ventilation. AKU Woodpanel's real wood veneer panels are built for exactly that use case, not for inside a shower enclosure.
Is 240cm or 300cm the right panel size for my bathroom?
Measure your actual wall height at three points first. A standard 2.4m ceiling suits the 240cm format; taller bathrooms need the 300cm option to avoid an infill strip at the top.
How much of a gap do you leave between wall panels in a bathroom?
Leave roughly 5mm of expansion gap at every join and wall edge. Humidity swings through 2026's seasons cause panels to move slightly, and the gap stops that movement from forcing joints apart.
Do wood veneer panels need special adhesive in a bathroom?
Yes, standard interior adhesive isn't rated for sustained humidity. Use a bathroom-rated or high-tack adhesive designed for damp environments to avoid bond failure at the base of the wall.
Why does my bathroom panel look a different colour than the sample?
Bathroom lighting is usually cooler and more direct than living room lighting, which shifts how wood grain and tone read. Always view a sample under the bathroom's actual light fixture before ordering a full wall.
Can wet wall panels go behind a freestanding bath?
Only if the panel is rated for direct water contact — a splashback area behind a freestanding bath still counts as a wet zone. Decorative wood veneer panels should sit further back, outside the splash radius.
How do I stop moisture building up behind a bathroom wall panel?
Check the room's extractor fan is running long enough after every shower and is rated for the room size. Trapped moisture behind a panel is almost always a ventilation issue rather than a panel defect.
One last thing
Most bathroom panelling complaints trace back to one decision made before installation even started: which zone the panel went into. Map the wet zone honestly before you shop in 2026, keep true wet wall panels inside it, and save the wood veneer finish for the walls steam reaches but water doesn't.