Ordering wooden wall panel samples before you commit to a full wall is the cheapest insurance policy in home renovation — get the finish wrong and you're stripping panels off plasterboard within a month. This guide walks through exactly how to order, test and judge wooden wall panel samples in the UK before the invoice for a full room arrives.
TL;DR
Order at least two or three sample finishes before buying full panels — screen photos consistently under-represent how wood veneer reads under real light. Akustiq UK stocks 11 sample finishes, including a Natural Oak sample panel, so you can compare grain and felt colour side by side rather than guessing from a product photo. Verdict for 2026: don't skip the sample step — it's the single cheapest way to avoid returning a full pallet of panels.
Why this matters
Real wood veneer isn't a print. Every batch of oak, walnut or smoked oak veneer carries natural variation in grain and tone, and that variation reads differently under a north-facing window than it does under warm evening lamplight. A finish that looks rich and dark on a laptop screen can look flat and grey once it's fixed to your living room wall.
The acoustic felt backing colour is the second variable people get wrong. Grey felt reads cooler than black felt even behind the same oak veneer, and that difference only becomes obvious once you're holding a physical sample next to your sofa fabric or flooring. Ordering wooden wall panel samples in 2026 costs a fraction of a full room's worth of panels — treat it as a mandatory step, not an optional extra.
What you'll need
- A shortlist of 2-4 finishes pulled from the product range (oak, walnut, black oak, smoked oak, mocca, grey oak, and the felt-backed variants)
- A tape measure and a note of your wall's dimensions, since Akustiq UK panels come in two size formats — 240 cm and 300 cm
- A spot on the wall that gets both daylight and evening artificial light
- A small offcut of your flooring or a cushion cover for contrast testing
- Optional: a tube of panel glue if you want to test-fix a sample rather than just prop it up
1. Shortlist your finishes before you order anything
Don't order every sample in the range — narrow it down first using room photos and existing furniture tones. Three finishes is usually enough to make a confident call; ordering all 11 wastes time and money on comparisons you don't need. If your room already leans warm (terracotta, tan leather, oak flooring), shortlist Natural Oak, Rustic Oak and Mocca rather than the cooler Grey Oak or Black Oak options.
Common mistake: shortlisting based on a single Instagram photo of someone else's room. Lighting, camera white balance and screen calibration all shift how veneer looks — treat online photos as a rough starting point, not a final decision.
2. Order sample panels for each shortlisted finish
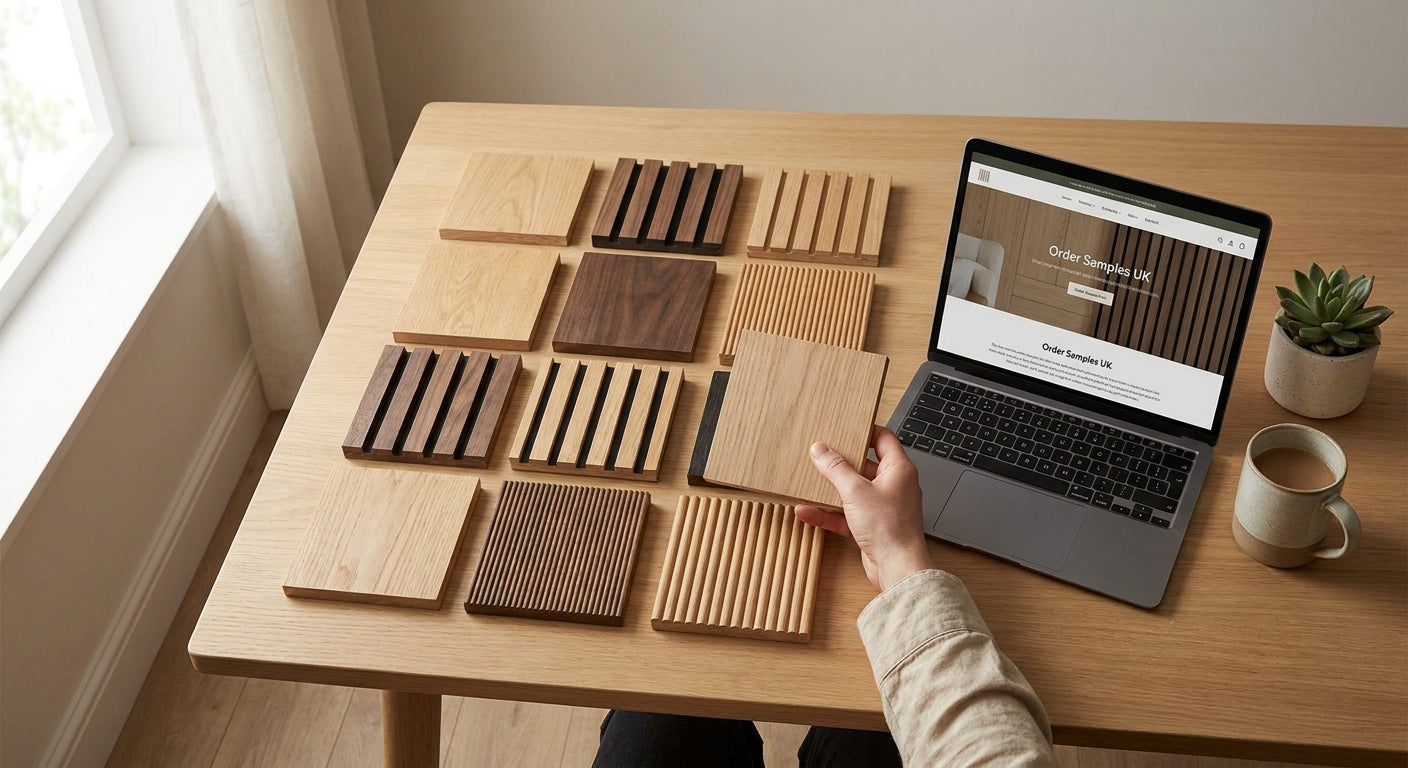
Sample panels are scaled-down versions of the full 3-sided veneer panel, so you're seeing the actual finish and felt backing, not a swatch printed on card. A Walnut sample panel shows you the real depth of colour and grain pattern you'd get on a full 240 cm or 300 cm panel.
Order one sample per shortlisted finish rather than one of everything. If you're comparing three finishes, three samples arrive together and you can lay them side by side in the same lighting session.
3. Check the samples in your room's actual light
This is the step people skip and regret. Prop each sample against the exact wall you're panelling, at the time of day you'll actually be in the room — morning light for a home office, evening light for a living room. Photograph each one on your phone so you have a record to compare later in 2026 when you're deciding between two close finishes.
Common mistake: judging samples under a single overhead bulb at midday. That flattens every finish to a similar mid-tone and hides the differences you're trying to spot.
4. Hold samples against furniture, flooring and trim
Wood veneer either complements or clashes with existing surfaces, and you won't know which until the sample is physically next to them. Hold each sample against your skirting board, your sofa fabric, and your flooring sample. A finish that looked perfect on its own can suddenly look muddy next to a warm oak floor, or too orange against cool grey tiles.
5. Test-fix a sample if you're still unsure
If two finishes are neck-and-neck after the lighting and contrast checks, use a small dab of panel glue to temporarily fix the sample to the wall for 24-48 hours. Living with it for a day or two, seeing it at breakfast and again at night, resolves close calls that photos never will.
Common mistake: relying on memory instead of a fixed sample. Colour perception drifts within minutes of moving between rooms — a physically fixed sample removes that guesswork.
6. Compare grain and felt colour between finishes side by side
Lay your ordered samples flat, next to each other, in the same light. Because acoustic wood panels use a 3-sided real wood veneer over felt backing, the grain direction and felt colour both affect the final look — two oak finishes with different felt backing can read as noticeably different tones once mounted.
7. Confirm the size format before you order full panels
Once you've picked a finish, measure your wall again and decide between the 240 cm and 300 cm panel format before placing the full order. Getting this wrong after samples are approved is the second most common return reason, right behind finish mismatch.
8. Place your full panel order with confidence
With a finish confirmed against real light and real surfaces, and a size format decided, you're ordering with evidence instead of a guess. That's the entire point of the sample step — it turns a five-minute product page decision into a confident, informed purchase.
Troubleshooting
The sample looks different from the sample on the product photo. This is normal — veneer batches vary slightly, and screens don't render wood grain accurately. Trust the physical sample, not the photo.
All my shortlisted samples look the same in my room. Move them to a different wall or check them at a different time of day before assuming they're interchangeable — subtle tone differences often only show up in specific light.
The felt backing colour doesn't match what I expected. Grey felt and black felt sit behind the veneer and shift the overall tone more than most people expect — always check felt-backed variants like the grey felt oak option specifically if your room needs a cooler read.
I ordered the wrong finish and already bought full panels. Contact the seller directly before installing anything — return policies vary, so don't fit panels you're not confident in.
A single sample panel is too small to judge properly. Order two of the same finish and place them side by side to get a wider visual read, particularly for finishes with strong grain variation like Rustic Oak.
The sample warped slightly after arriving. Store samples flat, away from direct radiator heat, until you're ready to test them — this keeps the veneer true for an accurate comparison.
Tools and resources
- Natural Oak sample panel — the most requested starting comparison for warm-toned rooms
- Walnut sample panel — for darker, richer feature wall comparisons
- Panel glue, 290ml — for temporary test-fixing a sample before committing
- A tape measure and your wall dimensions, checked against the 240 cm and 300 cm panel formats
What to do next
Once your samples are approved, read through the full walkthrough on how to order acoustic wall panel samples online for the ordering process itself, then move on to sizing your wall for the full panel order.
FAQ
What's the best way to order wooden wall panel samples in the UK? Shortlist 2-4 finishes based on your room's existing tones, then order one sample panel per finish so you can compare them side by side under your own lighting rather than relying on product photos.
Is it worth ordering more than one sample of the same finish? Yes, if a single sample feels too small to judge grain pattern — two samples laid side by side give a wider, more honest read, especially for finishes with strong natural variation like Rustic Oak or Forest Oak.
How many finishes should I compare before buying full panels? Three is usually the sweet spot in 2026 — enough to make a confident choice without wasting time comparing finishes that were never realistic contenders.
Do sample panels show the real veneer and felt backing? Yes, sample panels are scaled versions of the full product, so the veneer grain, colour and felt backing colour are accurate representations of what a full 240 cm or 300 cm panel will look like.
Does lighting really change how a wood panel finish looks? Significantly. The same oak veneer can look warm and golden under evening lamplight and noticeably cooler under daylight from a north-facing window — always check samples at more than one time of day.
Can I test-fix a sample to my wall before deciding? Yes, a small dab of panel glue holds a sample in place for 24-48 hours, which is long enough to judge it properly without committing to a full installation.
What size formats do wooden wall panels come in? Two standard formats are available — 240 cm and 300 cm — so measure your wall before finalising a finish, not after.
Should I judge samples against my existing flooring or furniture? Always. A finish that looks good in isolation can clash once it's next to your actual flooring or sofa fabric, so hold the sample against both before ordering full panels.
One last thing
The finish that photographs best on a product page is rarely the one people end up loving on the wall — the felt-backed and darker grain variants consistently surprise people once they're seen in real evening light rather than a bright studio shot. If you're torn between two finishes in 2026, pick the one that looked better at 8pm, not the one that looked better at noon on your phone screen.