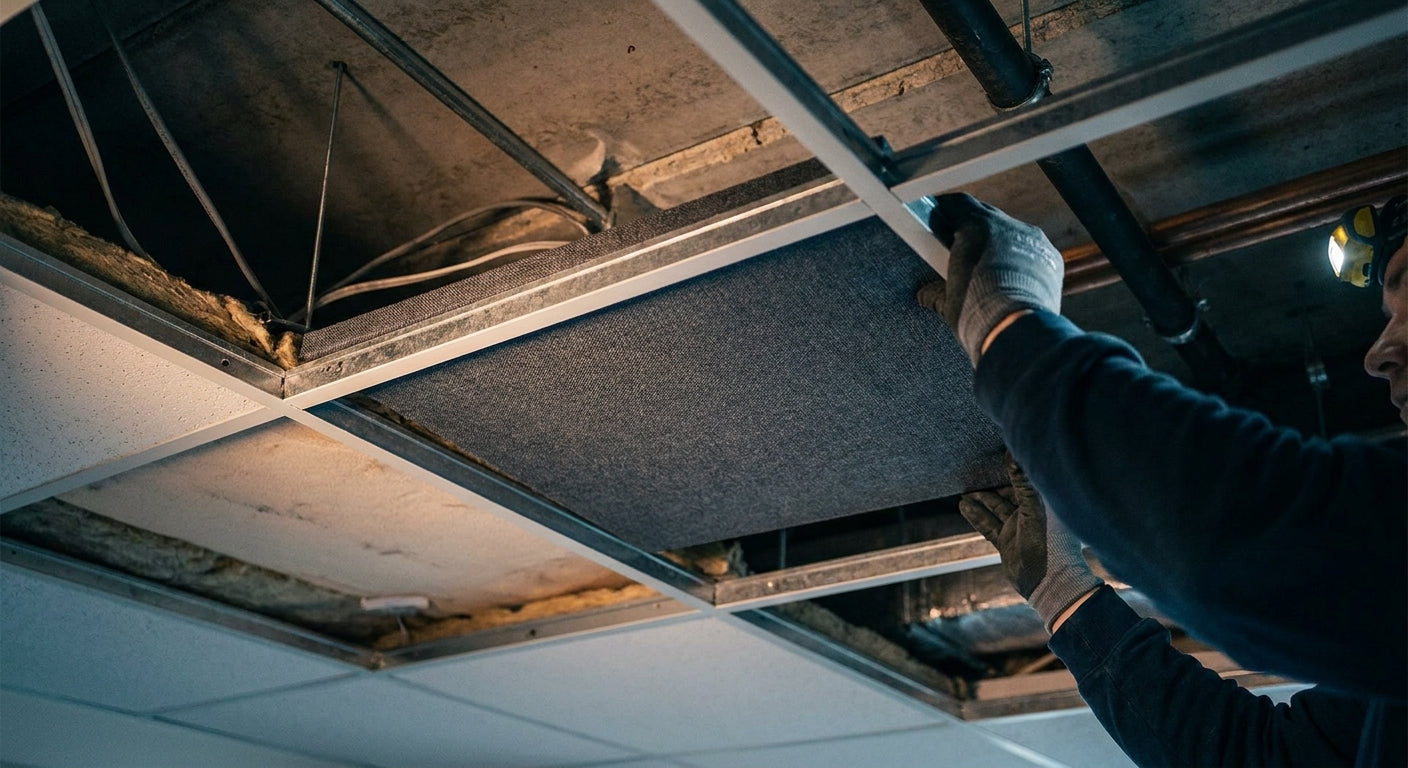
Sound leaking through a suspended ceiling void is a different problem to echo bouncing off a bare wall, and it needs a different fix — this guide covers exactly what to pack into that void, how deep to go, and when a visible acoustic panel is the better call instead.
TL;DR
Installing acoustic panels above a suspended ceiling means treating the void between the structural soffit and the ceiling tiles with sound-absorbing material, not hanging wall-style panels up there. For most UK offices and homes, 100mm mineral wool laid across the void cuts airborne noise transfer noticeably, and sealing gaps around light fittings and ductwork matters as much as the insulation itself. If you want a visible upgrade rather than a hidden one, Akuwoodpanel slat panels finished in natural oak veneer handle the room below while the void handles what's above. Verdict: do the void insulation first, panel the visible surfaces second — in 2026, most acoustic complaints in open-plan offices come from a combination of both problems, not one.
Why this matters
A suspended ceiling void isn't empty space — it's usually full of cable trays, ductwork, and gaps around downlights that let sound pass straight through from the floor above or between adjacent rooms sharing the same void. Offices with open-plan layouts and shared plenum ceilings are the most common source of this complaint, because sound travels sideways through the void far more easily than it travels through a solid floor slab.
Most people notice the problem as "I can hear the meeting room next door" or "footsteps from upstairs sound like they're in the room" — both are void transmission issues, not wall or floor problems. Fixing the void properly, before spending money on wall treatment, solves the actual source rather than masking it.
What you'll need
- Mineral wool acoustic insulation, minimum 100mm thickness, density around 45-60kg/m3
- Fire-rated ceiling tiles rated to match building regulations for the space
- A stable platform ladder or tower — never stand on ceiling grid
- Wire ties or clips to secure insulation against sagging
- Acoustic sealant or intumescent mastic for gaps and penetrations
- Dust mask, gloves, and safety glasses (mineral wool is irritating on skin and lungs)
- A torch and camera phone for documenting the void before you close it up
- Optional: wooden wall panels in natural oak if you're planning a visible acoustic upgrade to the room below once the void work is done
The steps
1. Assess the void depth and the noise source
Lift two or three ceiling tiles at different points in the room and measure the void depth — typical suspended ceiling voids in UK offices run 300mm to 600mm. Identify whether the noise is coming from above (footfall, HVAC), sideways (adjoining rooms sharing the void), or both. This determines how much of the void needs treating and whether you're dealing with airborne noise, impact noise, or both.
Common mistake: treating only the section of ceiling directly below the noise complaint. Sound travels laterally through a shared void far more freely than through a solid partition, so untreated sections nearby will just carry the noise around your fix.
2. Choose the right insulation thickness
For airborne noise reduction, 100mm mineral wool at 45kg/m3 density is the standard starting point and delivers a noticeable drop in transmitted sound; going to 150mm or doubling up layers improves it further but adds weight the ceiling grid needs to support. Rock mineral wool outperforms glass fibre for sound absorption at equivalent thickness, and it's also non-combustible, which matters for compliance in commercial spaces.
Common mistake: buying thermal insulation instead of acoustic-rated mineral wool — thermal wool is lower density and absorbs sound far less effectively even at the same thickness.
3. Access the void safely
Use a proper platform ladder, never the ceiling grid itself, which is designed to hold tiles, not body weight. Lift tiles carefully and lay them flat somewhere they won't get stepped on or cracked — replacement tiles that don't match existing ones will show as a patchwork from below.
Common mistake: working alone in a void with live cabling. Always confirm with a qualified electrician before disturbing anything near lighting circuits or data cabling.
4. Lay the insulation across the void
Roll or lay mineral wool blankets directly across the top of the ceiling grid, covering the full run rather than isolated patches. Secure it with wire ties looped over the grid's support wires so it doesn't sag onto the tiles over time — sagging insulation both looks bad through gaps and loses some of its acoustic performance once compressed.
Expected outcome: a continuous blanket of insulation across the void with no visible gaps when you shine a torch along the grid.
5. Seal penetrations and gaps
Every downlight housing, cable penetration, and duct opening in the void is a sound leak if left unsealed. Use acoustic sealant or intumescent mastic around each penetration — this single step often makes a bigger difference than adding another 50mm of insulation, because sound takes the path of least resistance through gaps rather than through the mineral wool.
Common mistake: insulating the void beautifully and then leaving a 20mm gap around a downlight housing, which undoes a large share of the acoustic gain.
6. Reinstate the ceiling tiles
Refit the original tiles or use acoustic-rated replacements if any were damaged during the lift. Check the grid is level and the tiles sit flush — a poorly seated tile creates its own small sound leak at the edges.
7. Test the result
Have someone stand in the adjoining room or the floor above and talk or walk at normal volume while you listen from the treated room. This isn't a lab measurement, but a clear before-and-after comparison tells you whether the treatment worked or whether a second layer or additional sealing is needed.
8. Consider treating the visible ceiling and walls too
Void insulation handles noise transfer between spaces, but it does nothing for reverberation and echo inside the room itself — that's a separate problem caused by hard, flat surfaces reflecting sound back into the space. If the room still sounds harsh or echoey after the void work, panelling the visible ceiling or a feature wall with slat-style acoustic panels tackles that second issue directly, and the guide to panelling a ceiling with wooden slat panels covers the fixing method in detail.
Troubleshooting
- Still hearing noise after insulation — check for unsealed gaps around light fittings first; this is the most common cause of a fix that "didn't work".
- Insulation sagging within weeks — the wire ties weren't secured to the grid's actual support wires, or the insulation is too heavy for single-layer ties; double up the ties.
- Ceiling tiles cracking during reinstallation — tiles were flexed too far when lifted; support them from underneath with a flat hand across the full tile, not just the corners.
- Room still echoey despite void treatment — the void work addresses transfer between rooms, not reflection within the room; add wall or ceiling surface treatment for that.
- Dust or fibre shedding through the grid — the mineral wool wasn't wrapped or the facing was damaged; use faced insulation or add a breather membrane.
- Building control queries on fire rating — always confirm the tile and insulation combination meets the fire rating required for the space before starting, particularly in commercial fit-outs.
Tools and resources
- Mineral wool acoustic insulation, 100mm minimum, from a builders' merchant
- Acoustic or intumescent sealant for penetrations
- Platform ladder rated for the void height
- High-tack panel glue if you're following the void work with a visible slat panel installation on walls or the ceiling below
- A torch, camera phone, and a notepad to log what's in the void before closing it back up
What to do next
Once the void is sorted, the next win is usually the visible surface — a room that still feels harsh will benefit from combining hidden void insulation with a panelled ceiling or feature wall, and the guide on combining acoustic ceiling and wall panels walks through how the two treatments work together rather than as alternatives.
FAQ
What's the best way to treat noise above a suspended ceiling? Laying 100mm mineral wool insulation at 45-60kg/m3 density across the full void, then sealing every gap around downlights and cable penetrations, is the standard approach for 2026 UK commercial and residential fit-outs.
Do acoustic wall panels work if installed above a suspended ceiling? No — wood veneer slat panels are designed as visible surface treatment for walls and ceilings you can see, not for hidden voids; use mineral wool or rigid acoustic insulation in the void itself and reserve slat panels for the room's visible surfaces.
How thick should insulation be above a suspended ceiling? 100mm is the standard starting thickness for airborne noise reduction; 150mm or a double layer improves performance further but adds load to the ceiling grid, so check grid capacity first.
Is mineral wool better than glass fibre for ceiling void acoustics? Yes, rock mineral wool typically outperforms glass fibre at equivalent thickness for sound absorption, and it carries better fire performance, which matters for compliance in most UK commercial spaces.
How much does it cost to insulate a suspended ceiling void for sound? Costs vary by void size, insulation thickness, and whether tiles need replacing, so get a quote based on the actual square metreage of your ceiling before budgeting.
Will void insulation stop an echo in the room itself? No — void insulation reduces sound transfer between rooms or floors; echo inside the room comes from reflection off hard surfaces and needs separate wall or ceiling panel treatment.
Can I do this as a DIY project or do I need a contractor? Small residential ceiling voids are manageable as a DIY project with the right ladder and safety precautions; commercial spaces with fire-rating requirements and live services in the void usually need a qualified contractor.
What's the difference between treating a suspended ceiling void and a solid ceiling? A suspended ceiling gives you access to the void above for hidden insulation; a solid ceiling has no accessible void, so treatment has to happen on the visible surface using panels or acoustic tiles fixed directly to the soffit.
One last thing
The detail most people skip is sealing gaps around downlights — a single unsealed 20mm gap can undo a meaningful share of the acoustic gain from a full layer of mineral wool, so spend the extra half hour on sealant before you close the tiles back up.