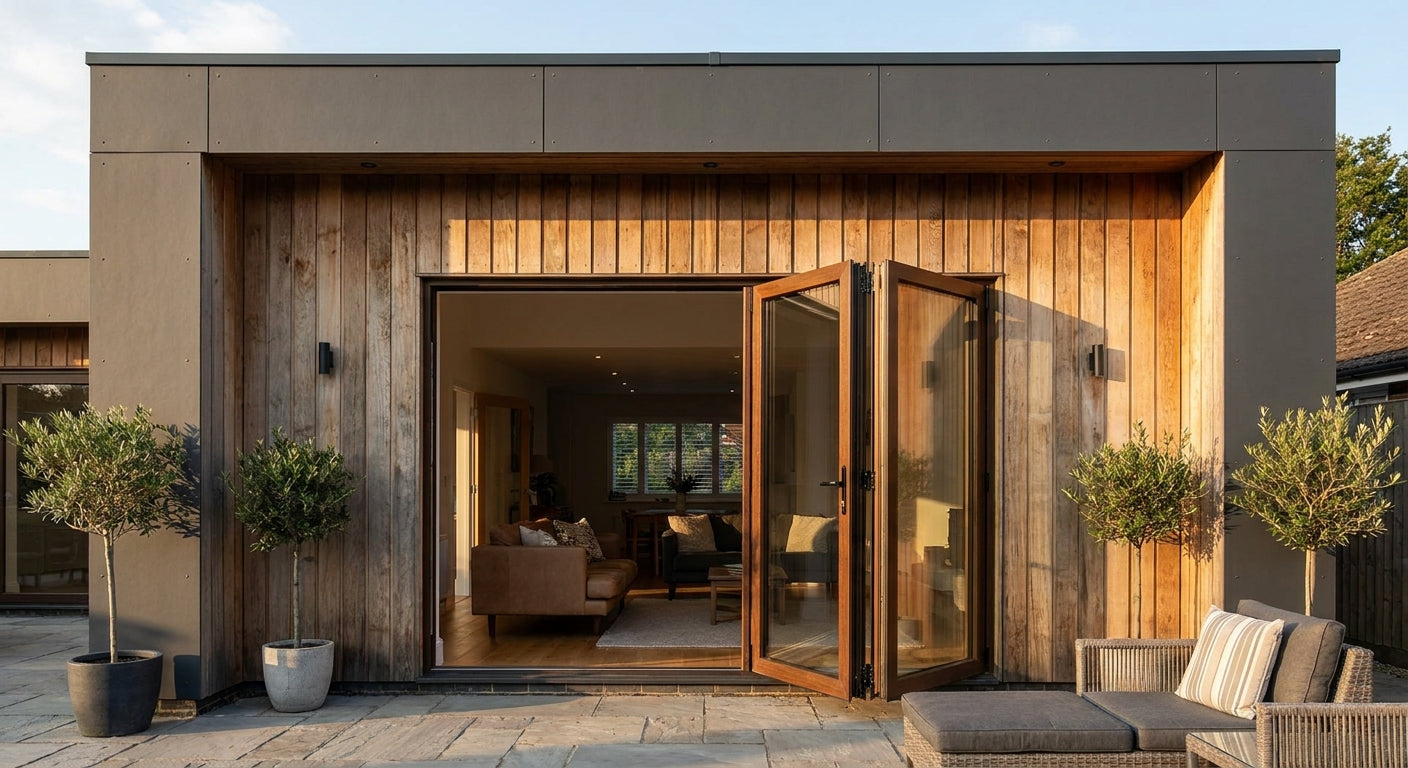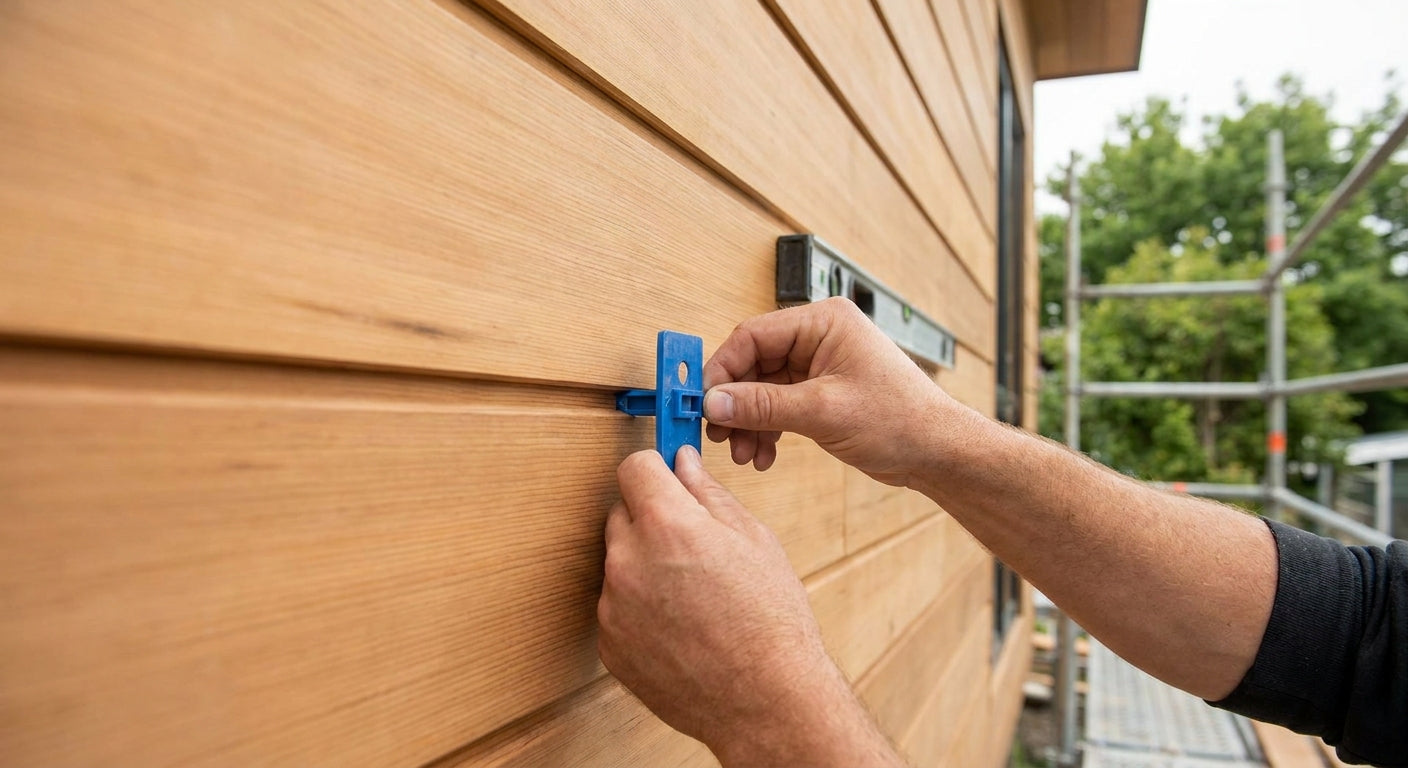
Uneven gaps between cladding boards are the fastest way to turn a decent exterior wall into an obvious DIY job — and they're almost always caused by skipping a spacer system, not by bad boards.
TL;DR
Even gap cladding board installation comes down to one habit: use a fixed-width spacer (6-10mm for most timber-effect boards) at every fixing point, not just at the start. Akuwood Panel's exterior wall cladding panels in oak, birch, black and stone grey finishes are designed for consistent board widths, which makes spacer-based fitting far more reliable than eyeballing gaps board by board. Skip the tape-measure guesswork, check level every third board, and expect a 3.6m wall (roughly 6-7 boards at standard widths) to take 2-3 hours once the first row is set. Verdict: spacer blocks plus a plumb starter board is the only method worth using in 2026.
Why this matters
A gap that drifts from 8mm at the bottom to 4mm at the top isn't just cosmetic — it signals the boards aren't plumb, which usually means water will track behind the cladding at the tight end. Consistent gaps also matter for timber movement: most wood-based cladding expands and contracts seasonally, and a gap under 5mm can close completely in humid UK summers, causing boards to bow or crack at fixing points. Get this right once at the start and every board after the first follows the same rule — get it wrong, and you're re-fitting a whole elevation.
What you'll need
- Tape measure and a 1.2m or 1.8m spirit level
- Spacer blocks or off-cuts cut to your target gap width (6mm, 8mm and 10mm cover most jobs)
- Cordless drill/driver and exterior-rated screws
- Chalk line or laser line for the starter board
- Cladding boards — exterior wall cladding panel in oak or your chosen finish
- Exterior wall cladding screws in oak sized to your board thickness
- Exterior wall cladding finishing trim in oak for edges and reveals
- Pencil, packers, and a helper for boards over 2.4m
The steps
1. Set your baseline before you touch a single board
Mark a level line 10-15mm above the finished floor or ground level — this stops water pooling against the bottom edge and gives every board above it the same starting point. Use a laser line if the wall runs longer than 3m; a chalk line alone drifts by 3-5mm over that distance and you'll be chasing the error all the way up. Expected outcome: a dead-level reference line the full width of the elevation. Common mistake: measuring off the ground instead of a level datum, which bakes in any slope the ground already has.
2. Cut your spacer to the exact gap width and stick to it
Decide your gap now — 8mm is standard for most timber-effect exterior boards, though tighter 6mm gaps suit smaller elevations and 10mm suits longer runs where movement is greater. Cut 8-10 identical spacer blocks from ply or MDF off-cuts; using a single tape measurement per board instead of a fixed spacer is where most gap inconsistency starts. Expected outcome: a stack of interchangeable spacers you reuse on every board, every course. Common mistake: cutting one spacer and eyeballing the rest close enough — over six boards that error compounds to 15-20mm of total drift.
3. Fix the starter board plumb, not just level
Check the first board with your spirit level held vertically against both edges, not just horizontally across the top. A board can read level and still be 4-5 degrees out of plumb if the wall or battens aren't true, and that lean carries through every subsequent board. Fix at the top and bottom first, check plumb again, then add intermediate fixings at 400-600mm centres. Expected outcome: your starter board reads plumb on both faces. Common mistake: trusting the wall's edge as your reference instead of an independent level check.
4. Insert spacer blocks at every fixing point, not just the ends
Place a spacer block at the top, middle, and bottom of each board join before driving a single screw — boards longer than 1.8m can bow enough mid-length to close the gap by 2-3mm if you only space the ends. Hold the spacer firm with one hand while fixing with the other, or clamp it temporarily. Expected outcome: identical gap width top to bottom on every board. Common mistake: spacing only at eye level and assuming the rest of the board follows — it rarely does on longer runs.
5. Recheck plumb and gap every third board
Drift compounds quietly — a 1mm lean per board becomes a visible 6-8mm lean by the sixth or seventh course. Stop after every third board, run the level vertically, and confirm the gap at both spacer points still matches your target width. Expected outcome: a wall that reads true across its full height, not just at the point you last checked. Common mistake: only checking at the very end, when correcting drift means removing several boards.
6. Finish corners and openings with proper trim, not cut boards
Corners, window reveals, and door openings are where uneven gaps become most visible because two planes meet. Use a dedicated finishing trim in oak rather than butting cut board ends together — trim absorbs small measurement errors that a raw board edge will show up instantly. Expected outcome: a clean, consistent line at every corner and reveal. Common mistake: mitring board ends by eye instead of using trim designed for the joint.
7. Fix your final board with a rip-cut, not a squeeze
The last board on a run rarely fits the remaining space exactly. Measure the gap, rip-cut the board to width plus your standard gap allowance, and fix it with the same spacer method — never force a slightly-oversized board into a tight gap, as this creates a visible pinch point. Expected outcome: the final gap matches every other gap on the wall. Common mistake: squeezing an unfitted board in because it's close enough, which shows immediately in raking light.
Troubleshooting
- Gaps widen from bottom to top — your starter board wasn't checked for plumb, only level. Pull the top three boards and re-set from a plumb reference.
- Gap closes completely in summer — your spacer width was under 6mm; timber-based boards need at least 6-8mm of movement allowance in most UK climates.
- Visible pinch points at joins — a board was forced into an undersized gap. Remove and rip-cut to the correct width rather than trimming the neighbouring board.
- Corner gaps don't match field gaps — cut board ends were butted directly instead of using finishing trim; trim hides the small dimensional variance that raw edges expose.
- Spacer marks or dents left in the board face — spacers were over-tightened or left in place too long under clamping pressure; use light hand pressure only.
- Fixing screws showing through the face — wrong screw length for board thickness; match screw length to the exterior wall cladding screws specification for your board.
Tools and resources
- Spirit level (1.2m minimum, 1.8m for longer runs)
- Laser line for elevations over 3m
- Ply or MDF off-cuts cut into fixed-width spacer blocks
- Exterior wall cladding panel in oak or your chosen finish, ordered with 5-10% wastage allowance
- Exterior wall cladding screws in oak matched to board thickness
- A full walkthrough on how to install exterior wall cladding panels if this is your first cladding job in 2026
What to do next
Once your gap system is locked in, the next question is usually quantity — ordering short leaves you re-measuring gaps mid-wall, ordering long wastes money. Work out your board count before you start fixing, not after: see how to calculate how many wall panels you need to get the maths right before the first cut.
FAQ
What's the standard gap width for exterior cladding boards? Most timber-effect exterior boards use an 8mm gap as standard, though 6mm suits smaller elevations and 10mm is safer for longer runs with more seasonal movement. The right width depends on board material and local climate exposure, but 8mm is the reliable default for 2026 installs.
Is a spacer block better than measuring each gap by hand? Yes — a fixed-width spacer removes cumulative measurement error, which is the main cause of gaps that drift from top to bottom. Hand-measuring each board individually almost always introduces small variances that compound over five or six boards.
How much gap should I leave for timber movement? Leave at least 6mm for timber-based cladding boards to allow for seasonal expansion and contraction. Anything under 5mm risks the gap closing entirely during humid periods, which can bow the board or crack the fixing point.
Do I need spacers at every fixing point or just the ends? Every fixing point — top, middle, and bottom of each board join. Boards longer than 1.8m can bow enough mid-length to close a gap that reads correct at both ends.
Can uneven gaps cause water damage? Yes, a gap that tightens toward the bottom of a wall can trap water against the board face instead of letting it drain, accelerating finish wear. Consistent gap width supports proper drainage across the whole elevation.
How long does it take to fit cladding with even gaps? A 3.6m wall at standard board widths typically takes 2-3 hours once the starter board is set plumb, plus extra time for corners and trim. Rushing the first board almost always costs more time later in corrections.
What if my last board doesn't fit the remaining space? Rip-cut it to width plus your standard gap allowance rather than forcing an unfitted board into the gap. Squeezing a board creates a visible pinch point that's obvious in direct or raking light.
Do corners need different gap handling than flat runs? Yes — use dedicated finishing trim rather than butting cut board ends together at corners and reveals. Trim absorbs small dimensional variance that a raw board edge exposes immediately.
One last thing
The single change that fixes more uneven-gap jobs than any other tool: stop measuring gaps with a tape after the first board. Once your spacer blocks are cut, the tape measure only comes out for cutting boards to length — every gap decision after that should be the spacer, not a fresh measurement, because that's where drift creeps in.