

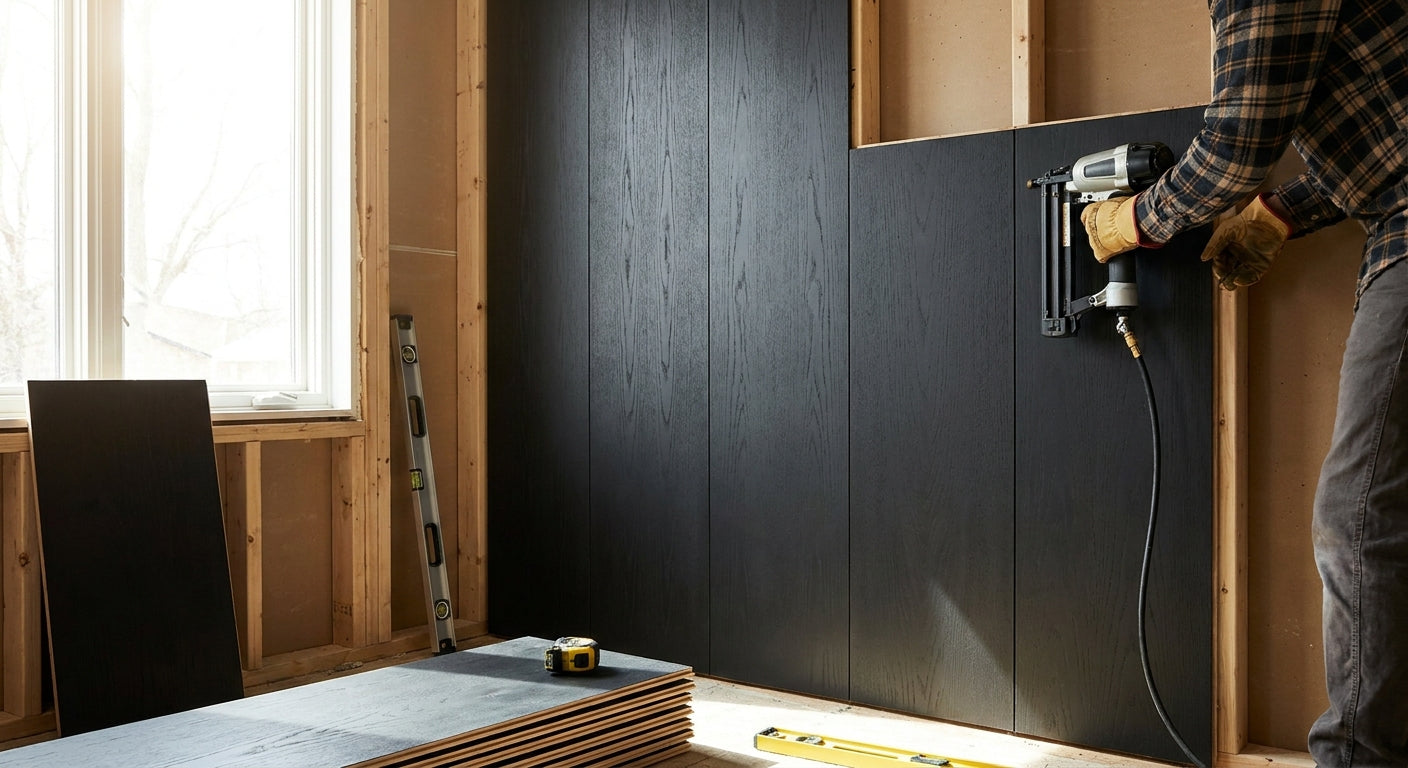
Installing black oak wall panels on a stud wall is one of the most satisfying weekend projects you can do — the dark, dramatic grain transforms a plain partition into a feature wall in a single afternoon.
TL;DR: Fitting Akustiq UK's wooden wall panel black oak to a stud wall in 2026 takes roughly 3–4 hours for a standard 3 m × 2.4 m wall. You fix the panels directly to the stud framework using panel adhesive and finish nails, working panel by panel from one side of the wall to the other. The acoustic felt backing absorbs mid-to-high frequency echo at the same time. No specialist tools required beyond a mitre saw, spirit level, and a caulking gun.
Why stud walls suit black oak panels
Stud walls give you a firm, consistent fixing surface at regular centres — typically 400 mm or 600 mm in UK residential builds. The 3-sided real wood veneer finish on Akustiq UK's black oak panels means the visible edges stay sharp and consistent even when you cut panels to fit around obstacles. The acoustic felt backing also sits flush against the plasterboard, so there is no air gap that would rattle or flex over time.
Black oak reads very dark in artificial light and very rich in natural light. It works in living rooms, bedrooms, home offices, and commercial reception areas equally well in 2026 — the finish pairs with matt black, brushed brass, and warm white without competing.
What you'll need
Panels and materials
- Akustiq UK wooden wall panel black oak (240 cm or 300 cm length, depending on ceiling height)
- Panel adhesive (construction-grade, solvent-free)
- Finish nails, 40–50 mm, or a brad nailer
- Timber battens, 18 mm × 44 mm (only needed if the stud centres exceed 600 mm or the surface is uneven)
- Wood filler in a dark tone, for nail-head touch-ups
- Corner trim or end-cap trim (if finishing exposed panel edges at corners or door frames)
Tools
- Stud finder
- Spirit level, 1.2 m minimum
- Pencil and tape measure
- Mitre saw or fine-tooth handsaw
- Caulking gun
- Sanding block, 120 grit
- Safety glasses and dust mask
Time: Allow 3–4 hours for a 3 m × 2.4 m wall in 2026, including acclimation time.
Acclimation: Leave panels flat in the room for 24–48 hours before installation so the veneer adjusts to the ambient humidity. Skipping this step is the single most common cause of warping after fitting.
Step-by-step installation
Step 1 — Locate and mark the studs
Run a stud finder horizontally across the wall at mid-height and mark each stud centre with a pencil line from floor to ceiling. Standard UK stud centres are 400 mm or 600 mm. Confirm with a second pass — stud finders can misread around cables and noggins.
Why it matters: Every adhesive bead and every nail must hit solid timber, not the plasterboard void between studs. Missing a stud means the panel can flex or pull away at the fixing point within months.
Common mistake: Assuming all studs are evenly spaced. Check every one individually — the spacing often varies at doorways, corners, and where builders added extra noggins.
Step 2 — Prepare the wall surface
The plasterboard should be clean, dry, and free of loose paint or wallpaper. Skim any raised screw heads or taping seams until the surface is flat to within 2 mm across a 1.2 m straightedge. Dust off before applying adhesive.
Why it matters: Panel adhesive relies on full surface contact. A ridge as small as 3 mm under a 240 cm panel will create a stress point that cracks the veneer finish over time.
Expected outcome: A wall that a 1.2 m spirit level sits flat against, with no rocking.
Step 3 — Establish your layout and first panel position
Measure the wall width and divide by the panel width to plan the cut sequence. Start from the most visible end of the wall — usually the end you see on entry — and work toward a corner or a door frame where a narrower cut piece will be less noticeable.
Snap a plumb chalk line at the position of the first panel's leading edge. Check it with a spirit level. This line controls the entire installation — if it is off by even 2°, the gap between every panel will drift visibly by the time you reach the far end of the wall.
Common mistake: Starting from the centre and working outward. It looks symmetrical on paper but often leaves two awkward cuts at each end that are visible from the room entrance.
Step 4 — Apply adhesive and fit the first panel
Apply panel adhesive in vertical beads at 200–250 mm intervals across the back of the panel. Add an extra bead along the top and bottom edges. Avoid applying adhesive directly behind the felt backing seams — press only on the solid MDF substrate.
Press the panel firmly against the wall, align the leading edge with your chalk line, and check plumb with the spirit level. Hold for 30 seconds, then pull the panel away from the wall by 10–15 mm and wait 3 minutes — this "open time" lets the adhesive become tacky and grip far more aggressively on re-contact.
Press back into position and apply firm, even pressure for 60 seconds. Drive 40 mm finish nails into each stud behind the panel — two nails per stud, one near the top and one near the bottom of the panel.
Expected outcome: The panel sits flat with no flexing along its length, and the leading edge is perfectly plumb.
Step 5 — Continue panel by panel, maintaining tight joints
Offer each subsequent panel tight against the previous one. The tongue-and-groove or butt-joint profile (depending on panel batch) should close without a visible gap. Check plumb on every third panel — small errors compound quickly across a wide wall.
For black oak, the dark tone makes gaps almost invisible in dim light but glaringly obvious in raking sunlight. Take the time to close each joint fully before the adhesive sets.
Common mistake: Allowing a 1–2 mm gap "for expansion". Black oak veneer panels are dimensionally stable enough to butt tightly — gaps are an aesthetic problem, not a necessary allowance.
Step 6 — Cut panels to fit edges and obstacles
Mark cuts directly on the panel face using a pencil and straightedge. Use a mitre saw with a fine-tooth blade (80+ teeth) to cut veneer panels cleanly. Cut with the veneer face upward when using a circular saw; face downward when using a mitre saw. This minimises splintering at the cut edge.
For electrical socket cut-outs, mark the recess position precisely, drill a 10 mm entry hole at each corner, and use a jigsaw fitted with a fine-tooth blade to complete the cut. Turn off the circuit at the consumer unit before cutting near any socket box.
Expected outcome: A cut edge that is straight, splinter-free, and can be covered with a corner trim or left visible if the cut is square enough.
Step 7 — Apply trims and touch up nail heads
Fit corner trim or end-cap trim to any exposed panel edges — door frames, window reveals, and wall corners. Mitre the trim at 45° for internal and external corners. Secure with adhesive and a single line of finish nails.
Fill nail heads with dark wood filler. Once dry (typically 20–30 minutes), sand lightly with 120-grit paper and wipe clean. For black oak, a small dab of the same filler is usually invisible against the dark veneer without any additional staining.
Common mistake: Using a light-toned filler on dark veneer. Even a small bead of beige or white filler stands out sharply against a black oak surface — match the filler colour before buying.
Troubleshooting
Panel pulls away from the wall within 24 hours The adhesive did not reach adequate bond strength — either the open time was skipped, the surface had residual dust or grease, or the ambient temperature was below 10°C. Re-bond using additional adhesive injected via a narrow nozzle behind the panel, clamp or brace overnight.
Visible gap opening between panels after installation The panels were not acclimated for long enough and are now contracting. Gaps under 1 mm can be filled with a dark flexible decorator's caulk. Gaps over 1 mm indicate significant moisture movement — remove the affected panel, re-acclimate, and refit.
Panel veneer chipping at cut edges The saw blade is too coarse or the feed speed was too fast. Slow down the cut or switch to an 80-tooth blade. Lightly sand the cut edge with 120-grit paper along the grain direction only.
Spirit level shows panels drifting out of plumb across the wall You have accumulated a small error at each joint. Remove the last 2–3 panels while the adhesive is still workable, reset your chalk line, and refit. Attempting to "close the gap" by angling later panels makes the problem worse.
Finish nails splitting the veneer face The nails are too close to the panel edge, or the nailer pressure is too high. Keep nails at least 15 mm from any edge and reduce compressor pressure by 10–15 PSI. Pre-drill if using a hammer.
Stud centres wider than the panel width Fix 18 mm × 44 mm timber battens horizontally at 400 mm vertical intervals across the stud faces, then fix panels to the battens. This gives you a continuous fixing surface regardless of stud spacing.
Tools and resources
- Stud finder — any branded model rated for 38 mm depth detection
- Spirit level, minimum 1.2 m
- Mitre saw with 80-tooth fine-finish blade
- Caulking gun (standard 310 ml cartridge fits most panel adhesives)
- Wooden wall panel black oak — Akustiq UK's flagship black oak panel in 240 cm and 300 cm lengths
- Corner trim and end-cap fittings for a clean perimeter finish
- Dark wood filler for nail-head touch-ups
For broader installation context — including how to handle plasterboard-only walls without stud access — see how to fit acoustic panels on a stud wall.
What to do next
Once the wall is finished, the next step for most rooms is managing the adjacent surfaces — ceiling reflections are often the remaining source of echo once a feature wall is treated. How to install natural oak wall panels covers ceiling panel fitting in detail and applies the same fixing method to horizontal surfaces.
FAQ
Do I need to remove the plasterboard before fitting black oak wall panels on a stud wall? No. You fix directly to the plasterboard surface — the panels bond with adhesive to the plasterboard face and nail through into the studs behind. Removing plasterboard is only necessary if it is damaged or damp.
Can I install black oak wall panels without nails, using adhesive only? On a stud wall, adhesive alone is not recommended for panels over 120 cm tall. The combination of adhesive and finish nails into studs ensures the panel stays flat if the bond is disturbed during the adhesive's cure window. For lighter panels on solid brick or dense block, adhesive-only can work — but stud walls flex slightly underfoot, making mechanical fixings important.
How many black oak panels do I need for a standard UK living room wall? A 3.6 m wide × 2.4 m high wall typically requires 7–8 full-length 240 cm panels, plus offcuts for any partial-width runs at the edges. Use Akustiq UK's how to calculate how many wall panels you need guide to get an exact count based on your wall dimensions, including wastage for cuts.
How do I cut black oak veneer panels without splintering the face? Use a mitre saw with a minimum 80-tooth TCT blade. Feed slowly, do not force the cut. For circular saws, cut with the face upward and score the cut line with a sharp knife first.
What type of adhesive works best for acoustic wall panels on a stud wall? Use a solvent-free construction adhesive rated for wood and plasterboard — products such as Grip Fill or a D4-grade panel adhesive work reliably in 2026. Avoid solvent-based adhesives on veneer panels as they can cause the veneer to blister.
Will black oak wall panels work in a room with underfloor heating? Yes, but acclimation is more important. Underfloor heating dries the air and causes more dimensional movement in timber products. Acclimate panels for 48 hours in the room with the heating running at its normal level before fitting.
Is it possible to remove black oak wall panels after installation without damaging the plasterboard? With care, yes. Score the panel joints with a sharp knife, use a wide pry bar padded with card to protect the wall, and work slowly from one edge. Expect some plasterboard paper to lift — this is repairable with a skim of filler and sanding before re-papering or painting.
Do the acoustic properties still work when panels are fixed directly to plasterboard? Yes. The acoustic felt backing remains between the wood veneer slats and the plasterboard, and it absorbs mid-to-high frequency sound regardless of the fixing method. You will not get the same low-frequency absorption as a decoupled acoustic system, but for controlling room echo in a living room, bedroom, or office in 2026, the improvement is immediately audible.
One last thing
Black oak reads noticeably different under warm versus cool LED lighting. Before committing to a full wall, fix a single panel temporarily and view it at different times of day — morning natural light, midday, and evening with your usual artificial lights running. The same panel can look near-black at night and a rich dark brown at noon. This is a feature of the real wood veneer, not a quality defect, and most people find it more interesting than a uniform painted wall — but it is worth knowing before you order 10 panels.
Share:
Best Black Oak Wall Panels for Bedrooms 2026
Rustic Oak Panels for Restaurant Walls 2026 | Buyer's Guide